|
Baby Crib |
| Created Using Photo impact version XL
skill Level intermediate.
Author; Jane Davidson
Web site:
Jane's Haven.
Email:
Here
Terms of Use:
here
Tools used: Path drawing tool, transform tools,
Air brush,
These files are optional, as you can use your
own: Lace
here, bows; here |
|
| |
1. open a new image, background color; i
used; #3B9AED size; 480X480
pixels. |
|
 |
 2, post; left front post, using the path drawing
tool, rectangle, color; #FFC8FF or use your own color,
size; 28X399, 3D chisel, use the transform tools,
perspective; 2, post; left front post, using the path drawing
tool, rectangle, color; #FFC8FF or use your own color,
size; 28X399, 3D chisel, use the transform tools,
perspective; to make the top slightly narrower. in the material
options set it to; border 8, width; 30, use the light
bulb to adjust the light, with the light to the left
to make the top slightly narrower. in the material
options set it to; border 8, width; 30, use the light
bulb to adjust the light, with the light to the left |
|
 |
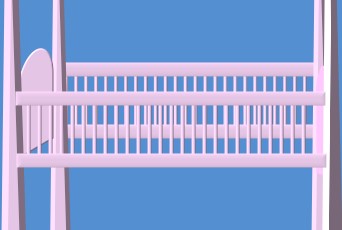
3. Adding 3 post. duplicate the first
post and place it on the right side. duplicate 2 more
times, reduce the length to; 351 pixels high. send both
to the back and place them closer together for the back
post. Please see example at left.
|
|


 |
4. crib head; Using the path drawing
tool, open the menu and find Arch 3. size;34X99 in the
same color as the post. 3D round, border/2. width; 30.
place this between the two post on the left. resize it
if you need , to make it fit. using transform tool,
slant, grab the left middle handle and move the left
side down a bit. send this behind the left front post. |
|
 |
5. Crib end; duplicate the arch we just
made, flip it horizontally, place it between to
two post on the right. resize the width to make it
smaller to fit between to two post, send this piece
behind to right front post. |
|
 |
6. Sides; Draw and rectangle, same
color, 3D round. border;6, width; 4, size; 310X14
pixels. place it between the left and right post, in the
front. duplicate this piece, place it under the first
one and downwards a few pixels.
draw another rectangle same color , 3D, with the
border;2 depth of 30, size; 4X60, place this
between the two rectangles we just drew. duplicate 25
times and space them across from one post to the other,
select all 26, align top and space evenly horizontally
and group, send them behind the two horizontal pieces. |
|
 |
7. side 2, Select the pieces you just
made, with the top and bottom rectangles and group
these, duplicate and send all the way to the back,
resize the width so that they don't show beyond each end
of the crib and move it up above the front side. |
|
 |
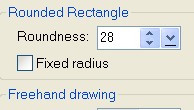
8,Sheet; Path drawing tool, shape
rounded rectangle, color white size; 296X25 pixels, in
the path panel, under shape, set the roundness to;28.
use the transform, perspective, to pull the front
outwards. place place this behind the two side pieces. |
|
 |
9. mattress; draw another rounded
rectangle, size; 309X53, color; I used the same color
pink, set the roundness to; 45, 3D round, border; 23,
depth; 30, place this under the sheet and send it behind
the side and behind two from post. |
|


 |
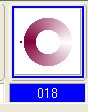
10. skirt; Draw a rectangle, 2D, size;
31X161 pixels. any color, go to gradient fill, click on
multiple colors, When the palette ramp opens,
scroll down and click on preset 018 or the color of your
choice. set the direction for the fill type from left to
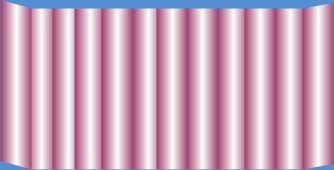
right, see left. the example at left
is what I have. duplicate this piece 11 times or until
you have enough to fit across the crib, place them side
by side, select all the pieces and right click arrange, align
bottom and place them just above the mattress, under the
sheet.
Using the transform tool, perspective, select
the first strip on the left and grab the middle handle
on the left and slant this side slightly upwards. do the
same for the last strip on the right, using the middle
handle on the right. See example on the left. |
|
 |
11. finishing skirt; I have
provided a link for the lace I made, at the top of the
page, for download or you may use your own. If using
mine, you may have to resize it to fit across the top of
the skirt. then I used the airbrush
with these settings; size; 10, soft edge; 50.color;
#AA3FAA, on the lace, paint a line matching with the
dark line of the skirt, where the skirt panels meet.
duplicate the lace and place it across the
bottom of the skirt.
|
|
 \ \
 |
12. shading; Select the back
pieces of the side, the two horizontal pieces and all
the vertical parts and merge as a single object, use the brightness and
contrast feature. click on the bottom left square twice
to darken the back side. Select the
front pieces of the side. right click and give it a
shadow, see settings at left, use the default setting.
|
|
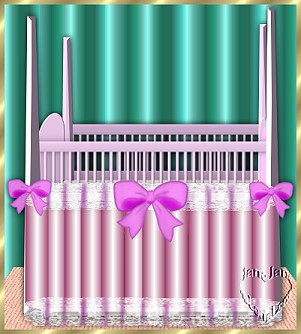 |
I added the bows and completed
the crib. |
|
 |
After completing this Tutorial feel free to download
the award on the left.
This award is offered to you on the honor system. Right click and save
to your own folder. Please do not link to any of my graphics. Thank you.
|
|