|
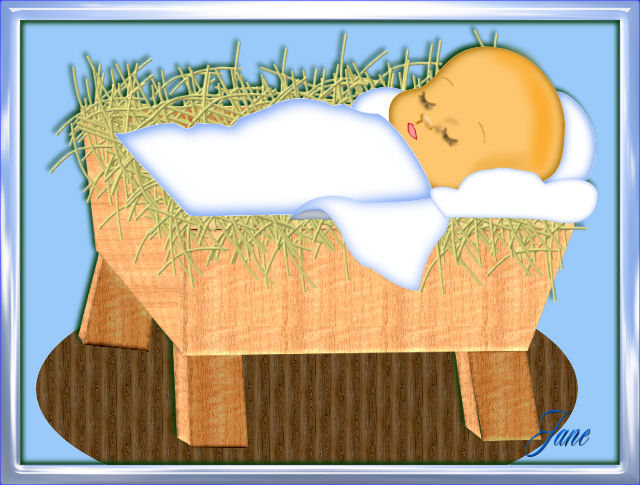
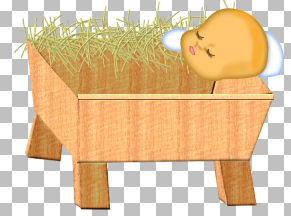
Baby Jesus Paint Shop Pro
Tutorial
I am Using Paint
Shop Pro Version 9, most
likely can be done in other versions as well. The
selections for Paint Shop Pro V7 will not work, I have
provided you V7 users with the selection for V7,
Here
by
Jane's Haven
Contact Us
Terms of Use
Get my Selections
Here.
Unzip them in a folder
of your choice.
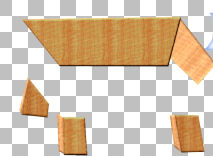
Wood pattern fill
and straw images
HERE
Don't forget the save
often. |
|
Open
wood Pattern and straw images. |
| 1.Open a new transparent image,
size;600X445 |
| 2.Add a new layer, name it,
front, load from disk the, 01-Front, if you are using my
wood pattern, in the material properties dialog, set the
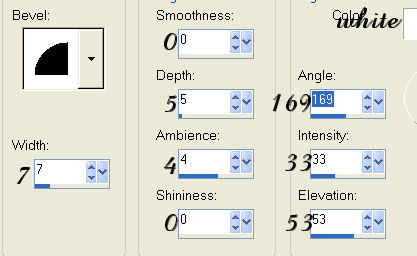
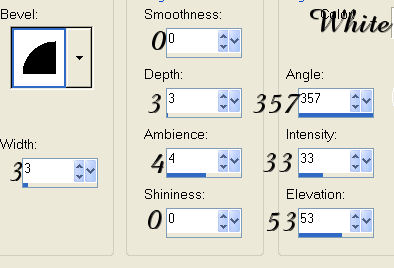
angle to; 133 and scale to; 50, flood fill. Add an inner
bevel with the following settings. Deselect.
 |
| 3. Add a new layer, name it,
blanket 1, load from disk the, 02-blanket1 selection,
flood fill with white. Float selection and add a cutout
with the following settings.
Vertical and Horizontal; 2
Opacity; 100
Blur; 13.00
Color; #7ca4f4
Repeat the cutout
changing the Vertical and Horizontal to; minus 2,
deselect. |
| 4, Add a new layer, name it,
back leg 1, load the, 03-backleg1. From here on, I will
assume your using my wood pattern. Open the material
properties and change only the angle to; 90,
flood fill. Add the same inner bevel
as in step 2, except change the angle to; 357 and
deselect. |
| 5. Add a new layer, name it, back
leg 2. load from disk, 04-backleg2, flood fill with the
wood pattern, same settings as in the last step. Add the
same inner bevel as in step 2, except change the angle
to; 357 and deselect.
Hi-light this layer in the palette, go to adjust,
bright/contrast use this setting; brightness; minus 58,
contrast; 0. |
| 6. Add a new layer, name it, back
strip, load the, 05-backsrrip, flood fill with the wood
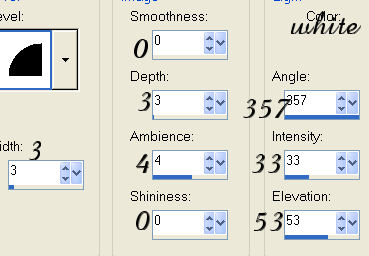
pattern changing the angle to; 0. Add an inner bevel
with the following settings. Deselect.
 |
| 7. Add a new layer, name it, back,
load from disk the, 06-back, flood fill with the wood
pattern, changing the angle to; 90, the scale remains
at, 50. Add an inner bevel with the following settings.
Deselect. Make sure this layer is hi-lighted in
the layer palette, go to adjust, brightness and use
these settings Brightness;-55, contrast; 0.
 |
| 8. Add a new layer, name it, left
leg 1, load the, 07-leftleg1, flood fill with the wood
pattern, settings; angle; 90, scale; 50.. Add the same
inner bevel as in step 2, changing the angle to; 357.
Deselect and keep this layer hi-lighted in the layer
palette, go to adjust, brightness and contrast, using
the following setting. Brightness, minus 55, contrast;
0. |
| 9. Add a new layer, name it, left
leg 2, load from disk the, 08-leftleg2, flood fill with
the wood pattern. Add an inner bevel with the same
settings as in step 2, except change the angle to; 357.
Deselect. |
| 10. Add a new layer, name it,
right leg 1, load from disk the, 09-rightleg1 selection
and flood fill with the wood pattern. Add the same
inner bevel as in step 2, change the angle to; 357.
Deselect and go to adjust, brightness and contrast with
these settings, brightness; minus 55, contrast; 0. |
| 11.Add a new layer, name it, right
leg 2, load the, 10-rightleg2, flood fill with the wood
pattern and add the same inner bevel. Deselect.
 |
| 12. Add a new layer, name it,
side, load the, 11-side selection and flood fill with
the wood pattern and add the same inner bevel. Deselect. |
| 13. Add a new layer, name it,
side strip, load from disk the, 12-sidestrip, flood fill
with the wood pattern, changing the angle to;0. Add the
same inner bevel as in step 6. Deselect and go to adjust
brightness and contrast, with the brightness set to ;
20, contrast; 0. |
| 14. Add a new layer, name it,
straw 1, load from disk the, 13-straw1 selection, open
the straw1 image, click, copy and back to the main
image, click past into selection and deselect. |
| 15. Add a new layer, name it,
blanket 2, load from disk the, 14-blanket2. Flood fill
with white, float selection and add a cutout with the
following settings.
Vertical and Horizontal; 2
Opacity; 100
Blur; 13.00
Color; #7ca4f4
Repeat cutout
changing the Vertical and Horizontal to; minus 2.
Deselect. |
| 16. Add a new layer, name it,
baby head, load from disk the, 15-babyhead. flood fill
with color; #fdc66f, float selection and add a cutout
with the following settings.
Vertical and Horizontal; 2
Opacity; 100
Blur; 12.00
Color; #a5740b
Repeat the cutout
changing the Vertical and Horizontal to minus 2.
Deselect. |
| 17. Add a new layer, name it,
eye lids, load from disk the, 16-eyelids selection and
flood fill with black and deselect. Go to adjust, blur,
average, with a setting of; 3. |
| 18. Add a new layer, name it,
eye lashes, load the, 17-eyelashes, flood fill with
black, go to adjust, blur , average, use these settings;
3. Deselect. |
| 19. Add a new layer, name it,
lips, load from disk the; 18-lips, flood fill with
color; #fd9b9b. Float selection and add a cutout with
the following settings.
Vertical and Horizontal; 1
Opacity; 100
Blur; 2.00
Color; #bc0000
Repeat the cutout
changing the Vertical and Horizontal to; minus 2
Deselect. |
| 20. Add a new layer, name it,
face shading, load from disk the, 19-faceshading, flood
fill with color; #d88400 and deselect. |
| 21. Add a new layer name it,
face shading 2, load from disk the, 20-faceshading2,
flood fill with; #f8a45a. Deselect and go to adjust,
blur, average, with this setting; 27. |
| 22. Add a new layer, name it,
nose, load the,21-nose, flood fill with; #fdc66f
and deselect. |
| 223 Add a new layer, name it,
nose shading, load from disk the; 22-noseshading, flood
fill with; #fee0b2, deselect.
|
| 24. Add a new layer, name it,
face shading 3, load from disk the; 23-faceshading3 ,
flood fill with; #e0ac0c, I had to click twice,
deselect. Go to adjust, blur, average, setting; 5. |
| 25. Add a new layer, name it,
face shading 4, load the; 24-faceshading4 selection and
flood fill with; #a46400, click 2 or 3 times. Deselect
and add blur average of; 5. |
| 26. Add a new layer, name it,
face shading 5, load from disk the; 25-faceshading5,
flood fill with; #a46400, click a couple of times.
Deselect and add a blur, average setting; 5.
|
| 27. Add a new layer, name it,
cradle back, load the, 26-cradleback, flood fill with the
wood pattern, angle; 90, scale; 50. Add the same inner
bevel as in step 6, deselect.
 |
| 28. Add a new layer, name it, cradle
back strip, load from disk the, 27-crdlebackstrip, flood
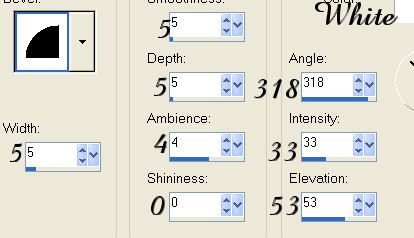
fill with the wood pattern, angle; 22, scale; 50. Add an
inner bevel with the settings below. Deselect.
In the layer
palette, drag this layer down below the straw 1 layer.
|
| 29. Hi-light the top layer and
add a new layer, name it, straw 2.load from disk the,
28-straw2 selection. Open the straw 2 image go to edit
copy, click back to the main image and click, paste into
selection and deselect. |
| 30. Add a new layer, name it,
straw 3. load from disk the, 29-straw3, open the straw 3
image and click copy, back to the main image and click,
paste into selection and deselect. |
| 31.Add a new layer , name it,
straw 4, load from disk the, 30-straw4. Open the straw 4
image and click copy, back to the main image and click,
paste into selection and deselect. |
| 32. Add a new layer, name it,
top blanket, load from disk the, 31-topblanket selection
and flood fill with white. Float selection and add a
cutout with the following settings.
Vertical and Horizontal; 4
Opacity; 100
Blur; 18.00
Color; #7ca4f4
Repeat cutout
changing the Vertical and Horizontal to, minus 4.
Deselect. |
| 33. Add a new layer, name it,
blanket back, load the, 32-blanketback selection and
flood fill with white. Invert selection and add a drop
Shadow with the following settings.
Vertical and Horizontal; 0
Opacity; 100
Blur; 8.00
Color; #7ca4f4
Deselect and go
to adjust, brightness and contrast, use the following
settings. Brightness; minus 55, contrast; 0. |
| 34. Add a new layer, name it,
blanket side, load from disk the, 33-blanketside flood
fill with white. Invert selection and add a drop shadow
with the following settings.
Vertical and Horizontal; 0
Opacity; 100
Blur; 18.00
Color; #7ca4f4
Deselect. |
| 35. Add a new layer, name it,
blanket side 2, load from disk the, 34-blanketside2,
flood fill with white. Add the same drop Shadow as in
step 33 and deselect. |
| 36. Add a new layer, name it,
eye brows, load the, 35-eyebrows, flood fill with,
#b48828 and deselect.........Completed..... |
|
To Save as a
Picture Tube, merge visible. To add a background, hide
the very last layer at the bottom and merge visible. |
|
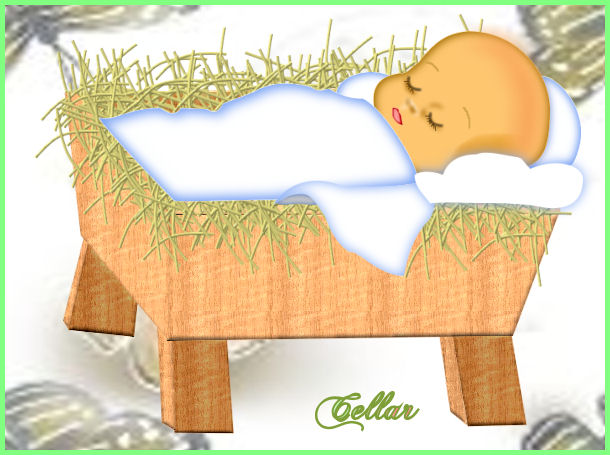
I am very grateful for Cellar, for
helping me by testing the tutorials. Above are Her
results, Well Done, Cellar. |
|

This is another
version by Mayflower. Thank You. |
© by Jane's Haven. All Rights reserved except where otherwise stated.