|
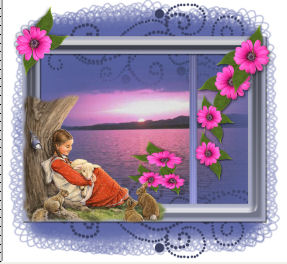
Day Dreams Paint
shop Pro Tag Tutorial
Paint Shop Pro
Tutorial
In this tutorial
l I am going to show you how to make water move with Eye
Candy 400 Jiggle. There may already be a tutorial for
this way of doing water, but I have not seen one.
I used Version X
but I am reasonably sure it can be done in many other
versions as well.
by
Jane's Haven
Contact Us
Terms of Use
Filters Needed, Eye Candy 400.
You will have to search for this filter as I couldn't
find it at Alien Skin,
website.
Supplies
HERE
Import the brush in your brush folder,
Open all images in PSP and minimize.
Put the mask in the PSP Mask folder.
If anyone knows who the girl tube
belongs to please let me know.
|
| 1.Open a new transparent image,
650X600 pixels, flood fill with white. |
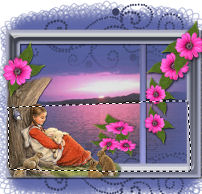
| 2. Add a new layer and fill with,
#5c65a6. |
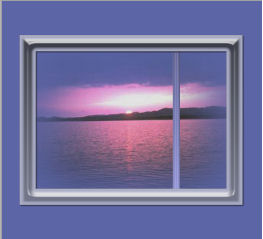
| 3.Open the frame provided and copy
and paste as a new layer. |
| 4. Using the magic wand, making
sure you are on the frame layer, click inside the frame,
both sides. Now add a new layer. Open the water image,
provided in the zip, go to edit, copy and paste into
select into selection. Move this layer down under the
frame. Deselect.
 |
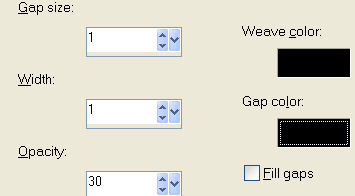
| 5. Using the preset shapes too,
rectangle, in the material palette change the foreground
to null, background color to, #5c65a6. Draw a vector
rectangle over the right side of the frame. Right click
on this layer to convert to raster layer. Move this
layer below the frame. Go to effects, texture, weave and
use the settings below. Next, lower the opacity to 36.Deselect.

 |
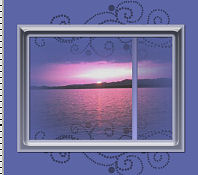
| 6. In the layer palette, high
light the Layer below the water image, add a new raster
layer. Grab the paint brush and find my brush.
Brushtip-JH-doddle3. Set the foreground color to,
#3c4164. Using the paint brush settings as below, click
on the bottom of the image. Half of the brush will be
seen through the frame. Duplicate and flip, you may have
to adjust the position .
 |
| 7. Open the mask, minimize, in the
layer palette, high light the layer just below the first
paint brush layer, on the blue layer. Go to, layers, new
mask layer, from image, find the JH-rectanglemask in the
drop down menu, make sure source luminance is checked.
Merge group. Or, you can drop the mask in the psp mask
folder. |
| 8. We are ready to add the tubes,
open all tubes. First, the side flower ,high light the
very top layer, copy and paste as a new layer, into the
main image and move to the right. |
| 9. Open the girltribe tube, Copy
and paste as a new layer, place on the left at the
bottom of the frame. |
| 10.
Now the corner flower, copy and past as a new layer,
move to the upper left corner, down a bit so it cover
the top of the tree trunk. |
| 11. Next, the 3 water flowers,
copy and paste as a new layer, place in the right just
above the frame bottom and to the left of the bar that
separates the frame. In the later palette, drag this
layer down above the water image.
 |
| 12.
You can add a drop shadow to all images if you like,
your choice. The drop shadow I used: H & V=2. opacity,
50, blur, 2, color, black. Add your name and any
watermark. |
13. Time to make the water move.
Using the free hand selection tool , also called lasso
tool, point to point, making sure you are on the water
image layer, make a selection around the water. , also called lasso
tool, point to point, making sure you are on the water
image layer, make a selection around the water.
 |
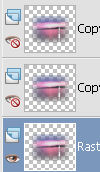
| 14. In the layer palette,
duplicate this layer twice for a total of 3. Hide the
two duplicates by clicking on the eye in the layer
palette and high light the original water layer. |
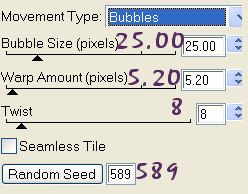
| 15.Next, got to effects find the
eye candy 4000, jiggle and use the setting below and
click OK.
|
| 17. Hide this layer and unhide the
one above. High light the layer, open Eye Candy 4000,
jiggle, using the same settings except click on random
seed once. Click OK, |
| 18.Repeat the steps for the third
layer of water. Deselect. |
| 19. We are going to add the same
eye candy 400, jiggle to the 3 water flowers. Make sure
you are on the water flower layer, got to selections,
select all, float, defloat. Duplicate twice, hide
the two duplicates, high light the bottom flower layer
and add the eye candy 4000 jiggle with the same
settings as step 15. Hide bottom flower layer, unhide the next one
up. use the eye candy jiggle, same settings, but click
the random seed once. Hide the middle layer, unhide the
top flower layer, give it the same eye candy jiggle
settings, clicking the random seed once. Deselect. 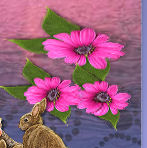 |
| 20.. Nest, hide the two top water
layers and hide the top two flower layers, open the
bottom water layer and the bottom flower layer. Then go
to edit, copy merged. Open animation shop and paste as a
new animation. Back to psp, hide the bottom water layer
and the bottom flower layer, open both, middle water and flower
layers. Go to edit, copy merged, in animation shop, go
to edit, past after current frame. Back in psp, hide the
middle and bottom water and flower layer and unhide the
top water and flower layers. Go to edit, copy merged and
back to animation shop, go to edit, paste, after current
frame. |
| 21. Still in animation shop, go to
edit, select all, next got to animation, frame
properties, in display time put 25 and click OK. Now go
to view, animation. If you are happy with the animation,
save as a gif. we are done, unless you want to
resize, to do that, go to animation, resize, I used 80
percent, with maintain aspect ratio.
Save as a gif. |