|

Easter Bunny in a
Can
Paint Shop Pro
Tutorial

I used Version 9
but I am reasonably sure it can be done in many other
versions as well.
You must have a
working knowledge of how to sue PSP.
by
Jane's Haven
Contact Us
Terms of Use
Get my Selections
Here.
Get Selections
for PSP Version 7,
here
The Pattern for the
can
Here. |
| Open the pattern , two flowers and
bow provided in the workspace. |
| 1. Open a new transparent imgae
size 450X450. |
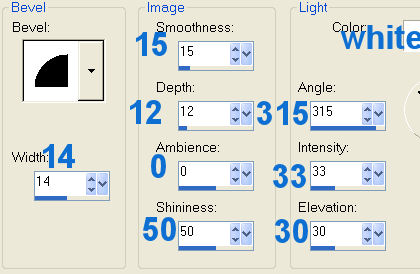
| 2. Add new layer, name it, nozzle
support, load from disk, 01-nozzlesupport, flood fill
with the pattern provided or use one of your own
patterns. If you use mine, set the angle to, 0 and the
scale to 50. You do this by opening the material
properties window. Add the following inner bevel.
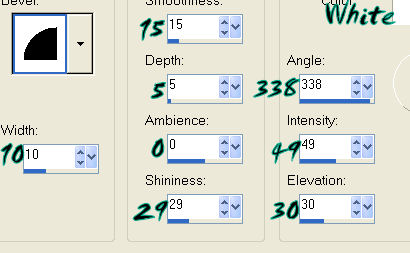
Deselect |
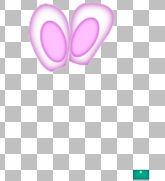
| 3. New layer, name it, right ear
1, load the 02-rightear1 selection, flood fill with
white. Float and add the following cutout.
V and H; 0
Opacity; 100
Blur; 20.00
Color; #a90fa7
Deselect. |
| 4. New layer, name it, right ear
2, load the 03-rightear2, flood fill with #ffc0ff. Float
and add the following cutout.
V and H; 0
Opacity; 100
Blur; 10.00
Color; #a90fa7
Deselect. |
| 5. New layer, name it, left ear 1,
load the 04-leftear1, flood fill with white. Float, add
the same cutout as in step 3 and deselect. |
| 6. New layer, name it, left ear 2,
load the 05-leftear2, flood fill with #ffc0ff. Float and
add the same cutout as in step 4 and deselect.
 |
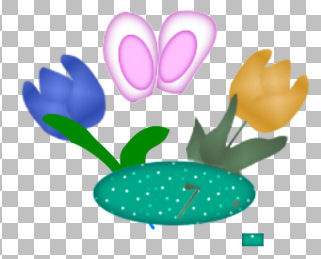
| 7. New layer, name it, left
flower, load the 06-leftflower selection, open the left
flower image, edit and copy and click on the main bunny image,
right click on the very top and click on paste into
selection and deselect. |
| 8. New layer, name it, can lid,
load the 07-canlid selection and flood fill with the
pattern provided or one of your own choices. Leaving the
settings the same in the material properties. Float and
add a cutout with the settings below.
V and H; 0
Opacity; 100
Blur; 22.00
Color; #05474d
Deselect. |
| 9. New layer, name it, right
flower, load the 08-rightflower selection, open the
right flower image, click copy, go back to the bunny
image and click paste into selection and deselect.
 |
| 10.New layer, name it, handle,
load from disk the, 09-handle selection, flood fill with
the pattern provided or one of your choice. If you use
my pattern, leave the setting as is. Add the following
inner bevel. Deselect.
|
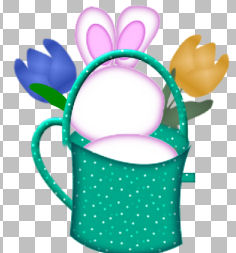
| 11. New layer, name it, bunny
head, load the 10-bunnyhead, flood fill with white.
Float and add the following cutout.
V and H; 0
Opacity; 100
Blur; 20.00
Color; #a90fa7
Deselect. |
| 12.New layer, name it, bunny body, load the
11-bunnybody, flood fill with white. Float and add the
following cutout.
V and H; 0
Opacity; 100
Blur; 20.00
Color; #a90fa7
Deselect. |
| 13. New layer, name it, handle 2,
load the 12-handle2, flood fill with my pattern or one
of your own. If you are using my pattern, the settings
in the materials properties window should be; angle; 0
and scale; 50. Now add the same inner bevel as in step
10. Deselect. |
| 14. New layer, name it, can front,
load the 13-canfront, flood fill with the pattern, same
settings. Float and add the following cutout.
Vertical; 0
Horizontal; 7
Opacity; 100
Blur; 20.00
Color; #05474d
Repeat the cutout
changing the Horizontal to minus 7 and deselect.
 |
| 15. New layer, name it, Nozzle,
load the 14-nozzle, flood fill with the pattern, same
settings. Add the same inner bevel as in step 10 and
deselect. |
| 16. New layer, name it, nozzle
top, load the 15-nozzletop, flood fill with the pattern,
same setting. Float and add the following cutout.
V and H; 0
Opacity; 100
Blur; 15.00
Color; #05474d
Deselect. |
| 17. New layer, name it, brim, load
the 16-brim selection, flood fill with the same pattern.
Add th same inner bevel as in step 10, deselect. |
| 18. New layer, name it, eyes, load
from disk the 17-eyes, flood fill with black. Add the
following inner bevel and deselect.
 |
| 19. New layer, name it, bow, load
the 18-bow. Open the bow provided and copy, activate
your bunny image and click, paste into selection and
deselect. |
| 20. New layer, name it, nose, load
the 19-nose, flood fill with #ffc0ff. Float and add the
following cutout.
V and H; 0
Opacity; 100
Blur; 10.00
Color; #a90fa7
Deselect. |
21. New layer, name it, mouth,
load the 20-mouth, flood fill with black and deselect.
Make sure the match mode in the menu bar is set to NONE.
You will see this setting when you click on the flood
fill tool. |
| 22. New layer, name it, neck
ribbon, load the 21-neckribbon, flood fill with #d91dff
and deselect. |
| 23. New layer, name it, left
paw, load the 22-leftpaw, flood fill with white.
Float and add the following cutout.
V and H; 0
Opacity; 100
Blur; 10.00
Color; #a90fa7
Deselect. |
| 24. New layer, name it, left paw
shading, load the 23-leftpawshading, flood fill with
#d91dff. Deselect and go to adjust, blur, average, use a
setting of 7. |
| 25. New layer, name it right paw,
load the 24-rightpaw, flood fill with white. Float and
add the same cutout as we did for the left paw.
Deselect. |
| 26.New layer, name it, right paw
shading, load the 25-rightpawshading, flood fill with
#d91dff. Deselect and go to adjust, blur, average, use a
setting of 3. |
| 27. New layer, name it, holes, load
the 26-holes, flood fill with #035748 and deselect. |
| 28. In the layer palette, hi-light
the, 11-bunnybody by click on it. Grab the paint brush,
using the settings below, set your foreground to white.
to paint over the pink shading at the top of the body, just
above the neck ribbon.

 |
|
You have completed
the tutorial, hope you enjoyed doing it. |
|
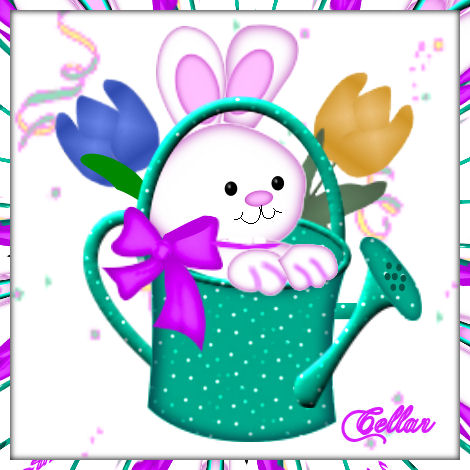
Wonderful work Cellar, your results
came out perfect. A big thank you for testing this. |

