|
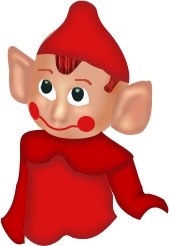
Santa's Elf Tutorial
|
Created with Ulead Photo Impact.on up to
PI12.
Skill Level: Intermediate
Author: Jane Davidson
Web Site: Jane's Haven
Email
Path drawing tool, paint on edges, blur, path
edit, dodge tool, air brush, paint brush, texture filter in Ulead.
Terms of
Use
|
|
Don't forget to save!!!!
This page is loaded with screen shots, please give it
time to load.
|
|


|
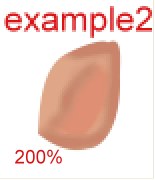
19. Shading the ears: Right
click on the right ear, convert object type and choose From text/path to
image. Use the airbrush Color:#CA846C, size:8, transparency:0, soft
edge:50 and shade around to outside of the ear and inside, see the example left. Change the size
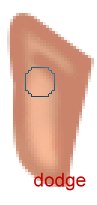
to:11 and the color to:#E48F73 to shade in the center like the example #
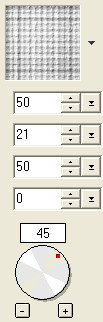
2. Using the dodge tool with the settings left,
lighten the ear as you see in the example #3.
Using the blur tool, with the settings below:

Blur the ear, not too much or it will all the shading
together, go lightly.
On the left is my finished ear.
|
 |
20. Shading the left hear: Right click on the left ear
and convert it to an image. make sure it is selected,
Use the airbrush Color:#CA846C, size:8, transparency:0, soft edge:50 and
airbrush around the edge of the ear and next to the face so it blend with
the shading of the face and inward towards to middle of the ear.. Now
change the size of the airbrush to 5, airbrush about 1/4 way in from the
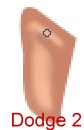
top. See example at left. Using the dodge tool size: 10, soft edge: 100,
level:28, shade a bit away from the outer edge, leave a space between where
you airbrushed the outer edge, see example.
Change to size of the dodge tool to:4 all other settings
the same. Run the dodge tool like the dodge 2 example at left.
Now using the blur tool, size:20,softedge:50, level:3,
lightly tap on the ear to blend it, not too much. |
|
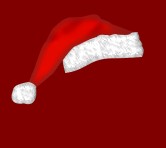
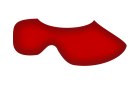
21. Shading the hat: use the paint brush size:11,
transparency:0, soft edge:100, color:#871D1F and paint on edges, you may have to right
click to change it to an image. Using the blur tool, size:29, soft
edge:50. level: 5, blur the edges of the hat. Left is what mine looks
like. |
|


 |
22. Shading his little bit of hair, first we will do the hair in the
front. Right click and convert to an image, keep selected, using the
paint brush, color:#871D1F, see setting on the left, to paint on edges.
Grab the blur
tool with these settings. size:20, soft edge:50, level: 5 to lightly
blur the edges of the hair. With the dodge tool, see settings at left.
Dodge in the center and on up to the very tip of the hair that meets the
hat. Use the blur tool, same settings to blend it in with the rest of
the hair. I did one more effect with the texture filter found in PI. See
the examples at left for the texture filter, I used texture:
emboss003.bmp, with the default settings.
For his side burn, we are going to do the same way, except change the
size of the paint brush to:3, paint on edges.
Blur tool, change to size to: 10, now blur and blur the edges. Change to size of the
dodge tool to:5, dodge in the center and blur again. Use the texture
again but change the variation setting to:33. Send behind the hat.
On the left is what I
have now. |
|
23. The Elf's Body: Collar: Path drawing tool, ellipse, size:106X66,
color:#D91314, 2D, click into path
edit and edit the shape like in the example left.
24. Shading on collar: Paint brush,
color:#871D1F size:10, transparency:0, soft edge:50, you can go to the men bar, and
find paint on edges or, while holding the shift key and the letter P to
POE.
Using the blur tool, size:20,
soft edge:50, level:5 , blend in the POE you just did. |
|
 |
25. Right arm: Path Drawing tool, Ellipse, draw an ellipse, size:32X67,
2D, color:#D91314,
click into edit mode to edit the shape like the one opposite.
Paint on edges, convert to image,
paint brush, color:#6F1819 size:7, transparency:0, soft edge:100, in
your menu, under effects, find Paint On Edges. Blur the edges with the
blur tool, with these setting: size:20, soft edge:50, level:5.
Use the burn tool, size:6, soft
edge:50. level:50 to shade where the arm bends on the right side of the
sleeve. Use the blur tool, same settings to blend.
Send behind the collar. |
|

 |
26. Left arm: Path drawing tool, ellipse, size:27X99, color:#D91314,
2D, go into edit mode to edit the shape shown opposite. After you get
the shape like you want it, set you paint brush to the settings opposite
with color:#6F1819 and go to menu, effects and paint on edges. Use the
blur tool with these settings: size:15, soft edge:50, levels:3, just on
the edges.
|


 |
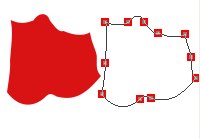
27. His Shirt body: Path drawing tool, ellipse, color:D91314,
size:85X72, 2D, Path edit, add nodes, as many as you need and edit the
shape like the example at left.
When you have the shape like you
want it set your paint brush to these settings, size:15, transparency:0,
soft edge:100 and paint on edges and watch is do it's thing. With your
blur tool, settings at left, blur the edges. Send it under the collar.
At left is what I have now. |
|

 |
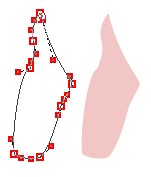
28. Let's give him some legs. Right leg: Path drawing tool, ellipse,
colo:D91314,
size:59X117, 2D. Edit the shape like the example on left.
Paint on edges with these settings,
color:#9D2628, size:15, transparency:0, soft edge:100. Use the blur tool
with the settings on left to blend in the POE.
Send to back behind the shirt and
sleeve. |
|

 |
29. Left leg: Path drawing tool, ellipse, size:139X84, color:D91314,
2D. Click into path edit again and edit the shape like the example on
the left.
Paint on edges with these settings,
color:#9D2628, size:15, transparency:0, soft edge:100. Use the blur tool
with the same settings on left to blend the POE.
Send to back behind the shirt and
sleeve. |
|


|
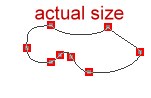
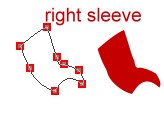
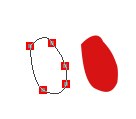
30. We are going to give him mittens. Right mitten: With custom
shape: B46, see example of shape at left as yours may have a different
name,
depends on the version of PI you have, size:24X36, same color red as the
leg, 2D, flip it vertically, place it at the open end of the right
sleeve and resize to:33X43, rotate the shape 35
degrees counterclockwise. Go into edit mode, click on the top line and convert to
curve. Edit the shape like the example left. Using the
paint brush with the settings at left. color:#9D2628, Paint on Edges.
Use the blur tool with settings like the example and blend.
Draw an ellipse for the thumb, size:7X24, same color. click on your
transform tool and set the rotate by degree to 25.00% rotate to the
right. Place this on the left side and behind the mitten. Set you paint
brush settings like the example at left, except change the size to:4 and
POE. Select the two shapes of the mitten.
I used a texture on the mitten. Using the Texture
filter that came with PI in menu, effects. Click to find (emboss011.bmp.
See my illustrations at left for the texture filter and the finished
mitten, send behind the sleeve. Group the mitten, duplicate and flip horizontally
and using the rotate by degrees: 25% clockwise and place it on the other
side under the left sleeve, send to the back.
You are finished.
I hope you enjoyed my tutorial.
|
|
 |
After completing this Tutorial feel free to download
the award on the left.
This award is offered to you on the honor system.
Right click and save to your own folder. Please do not link to any of my
graphics. Thank You.
|
|
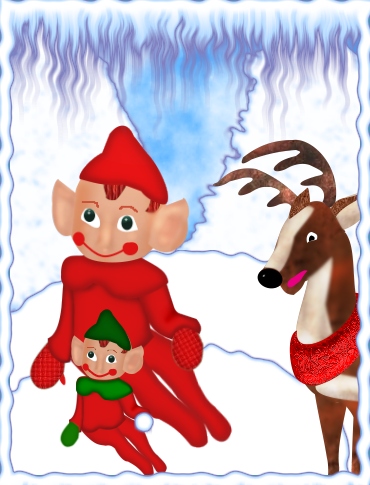 |
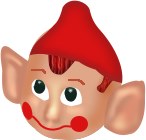
The Elf's on the left were done by Jeaney, who tested the tutorial for
me. Many many thanks, Jeaney. Click on the picture to visit her
beautiful site on the web. |
|