|
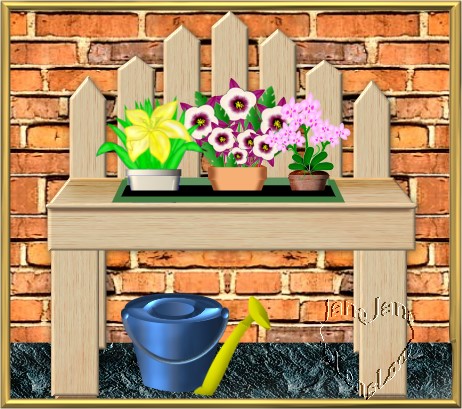
This Tutorial is a Gard4en Bench to
hold Flowers. Using Photo Impact Version XL. Can be done
in other versions as well.
By Jane's Haven
Terms of Use AM 101790da
Any Questions, Feel free to
Email US
Extra Supplies; Wood Presets, HERE
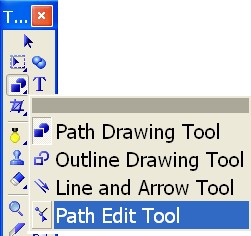
Tools Used; Path Drawing, path edit
tool, continue draw, perspective, outline drawing tool.
Skill Level; Intermediate. |
|
 |
| |
1. Open
a new image, white background or color of your choice,
size; 425X425. |
|

 |
2. Using the path drawing tool
Rectangle, draw a rectangle, size;38WX275H pixels, any
color for now. Go into path edit, add a point at the
center top, to pull it up, see example. Click out of
path edit, use a wood preset of your choice or download
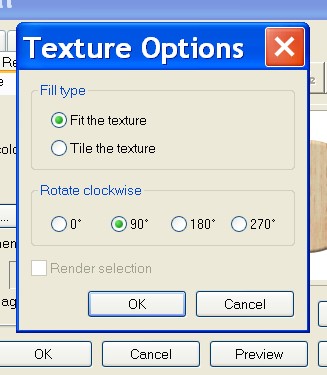
mine from the top of the page. We want the wood grain
going in a vertical direction, therefore if. the grain
is running horizontal in the preset your using, open the
material adjustment tool, click on the, color, texture
button at the top, then, click,, options to tick the 90
degree button. Settings should be, 3D round, , border 4,
depth 30. Click OK.
This is the first back board on the
left. |
|
 |
3. Now duplicate this board and resize
the height to:162 pixels, place it to the right of the
first one, leaving a space between the two. Raise the
second one somewhat higher. |
|
 |
4. Make another duplicate, resize the
height to; 190 pixels. this is the third back board,
move it right and up a bit, again, leave a space between
them..
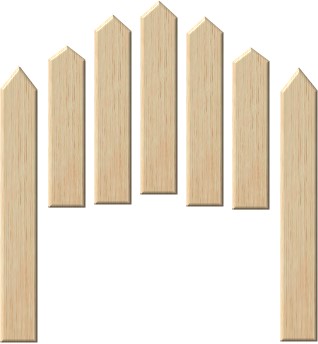
5.Duplicate once more making the height;
195 pixels, this is the middles board.
Now, holding down the control key, click
on the first 3 boards and group, then, duplicate and
flip horizontally. Place on the right of the middle one.
Select all 7 boards, right click, align,
then click align horizontally. |
|
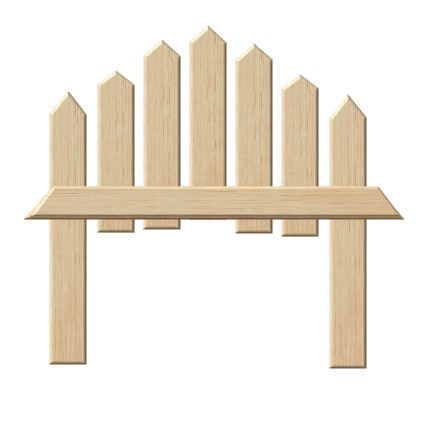 |
6.The seat; Draw a rectangle size'
327X31, same wood preset and same settings. place in
front of the 7 back boards, near the bottom of the
boards.
Using the transform tool, perspective, grab
the left front handle to widen the front. |
|
 |
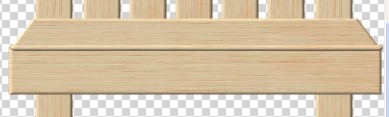
7. Draw a rounded rectangle, the same
width as the seat front, 6 pixels in length. 3D, border;
3, depth 30, the same wood preset. Place it across the
seat front. |
|
 |
8. Draw a rectangle, size; same
width as the last piece X48H. 3D. same wood preset, same
settings, place this below the seat and the strip across
the front of the seat and send it behind both. seat piecess.. |
|
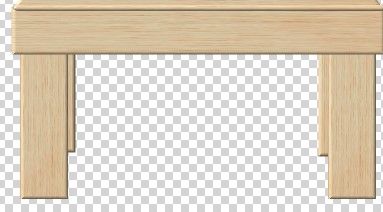 |
9. Front legs. Draw a rectangle, size; 48WX164H,
same wood, the grain should be running vertically, same
settings, in 3D round, for the left leg. Place on the left send it
behind the seat pieces. Duplicate and place the
duplicate on the right side.. these should be placed
further to the outside, so that, you can see a bit of
the back legs. Select both of the legs while holding the
control key and align bottom. |
|

 |
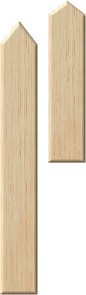
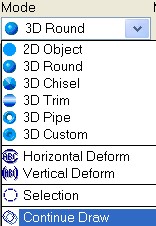
10. Select the seat bottom. go
to continue draw mode, use the rectangle shape, draw a
rectangle in the middle of the seat. Now open the path
drawing tool drop down menu and click on path edit tool.
Shown at the left.
Use the path edit tool to pull the
front tow nodes outwards a bit, to give it perspective,
See example at left. Line the back up with the seat back
or it will leave a bit of the seat in the back.
Now we have the opening for the
flowers. |
|
 |
11.Using the rectangle shape, draw a
shape the width of the opening in the back of the
seat and 6 pixels in height. Group tre seat and the last
shape. |
|
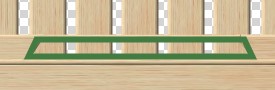 |
12. Use the outline drawing tool,
rectangle, size; 205X23H,I used a green color #437C43,
to go around the opening. Border of 3, in 2D. Yours may
be a different width, depends on the size of your
opening.
Use the transform tool perspective to
pull the front outwards, to the left and right for
perspective.. |
|
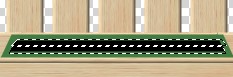 |
13. Draw another rectangle in black to
fit the same opening but only half of the length of the
opening. You must use the transform tool perspective for
pull the front outwards to fit the opening properly.
Draw another rectangle in the color
black, to fit the front half of the opening. Use
perspective once more. Send both behind the green
rectangle outline. See
left. |
|
 |
14. Now for a little shading. Using
the paint brush, size;10, soft edge; 100, color;#6E472E,
straight line and in paint as object mode. Hold
the shift key down and draw a straight line over to the
left side.See example at left. |
|
 |
15. Activate the burn tool, size; 45,
level; 100, soft edge; 50, select the seat, ungroup,
select only the seat to burn the back edge of the seat.
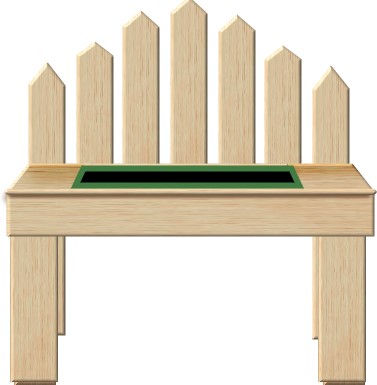
There you have a pretty bench for your
flowers, which can be placed between the two black
rectangle. |
|
 |
16. I found a small problem while
place the flowers. the green rectangle outline must be
erased at the back, for the flowers to look like they
are centered in the rectangle, so then I drew a small
rectangle to fit behind the flowers in the same color
green as the rectangle outline shape. See Left |
|
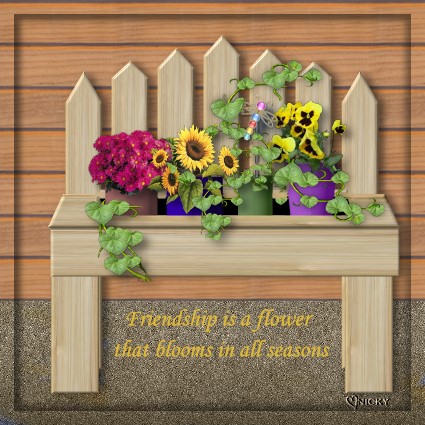
Thanks Niicky for Doing my Tutorial.
It is really a Beauty. Nicky is a Very Dear Friend I met
online. |
 You may download the award on the left.
Which is my thanks for doing my Tutorial
Please do not link to
any of my graphics. Thank you.
|
© by Jane's Haven, all rights Reserved.