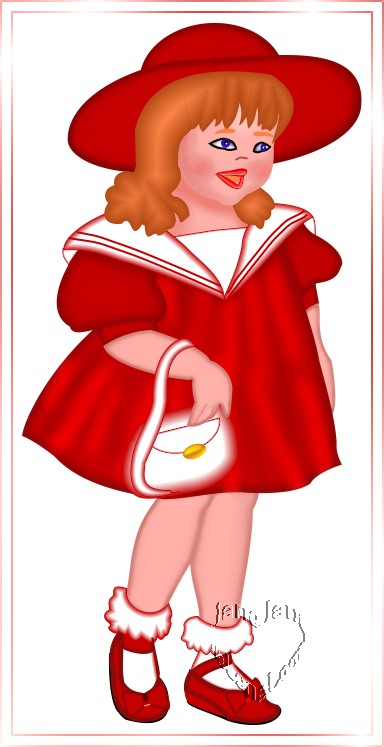
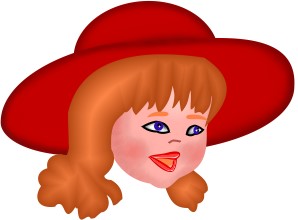
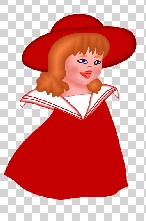
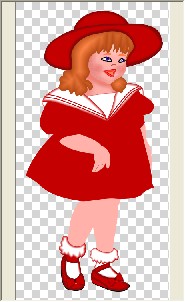
Little Girl Tutorial
|
|
Created with Ulead Photo Impact.
PI
Version-I am using version PIXL,
I am certain it can be done in earlier versions, from PIXL on up to
PI12
Skill Level: Intermediate
Author: Jane Davidson
Web Site:
Jane's Haven
Email
Terms of Use:
Here
Tools Used; Path drawing tool, paint on edges, blur, path
edit, dodge, burn tool, airbrush, line and arrow.
You can download the lips preset here |
 |
| |
1. Open a new image,
440X800 pixels, white Background |
|
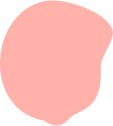 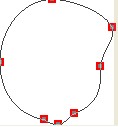 |
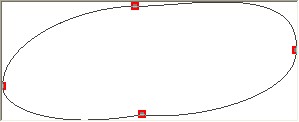
2. Face: Using the path drawing tool,
ellipse shape, 2D mode, draw a ellipse size; 105WX127H, hex color;
#FFB1AA We are going to edit the shape,
go into path edit mode to
edit the shape like in the example at left . |
|


Enlarged |
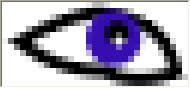
3. Eyes: Left eye, Use the
ellipse shape again, color white, 2D, size; 22X10 Pixels, Go into path
edit and edit the shape like in the examples. duplicate this eye, change
the color to black, 3D pipe, border; 1, depth;1 Select both eye shapes to align center
both
3A, Eye continued: Draw a circle, 2D, size; 10X10 any color you want, I
used a dark purple.
Now draw another circle in black, 5X5
pixels. Put them together like the example.
Using the paint brush color; white, size; 3,click on paint as
abject, Make a small dot on the black circle.
|
|
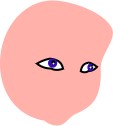 |
4. Right eye; Select
all 5 parts of the eye and group. Click on the transform
tool,
flip horizontally, and place on the other side of the
face. Ungroup All parts of the right eye and move the
purple, black circle and paint dot over to the right a
bit. Like in the example.
|
|


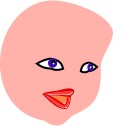 |
5. Top Lip; Use the ellipse shape,
size; 34WX13H, color;#C81703, 2D. Go into path edit and make the shape
like in the example. 5A. Bottom Lip; draw another ellipse same size
and color, edit this on like in the example.
You can use the lips preset offered for download or do your own
thing.
Draw another ellipse, color;#FF8648, 2D to go between her lips, to
fit the opening. Send behind the lips. |
|
 |
6. For her nose, use the, line and arrow
path tool, spline, size;1, 2D, color; #C1695F with a slight curve, under the eyes. |
|

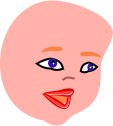 |
7. Eye Brows; Using brush tip #1 draw a
small shape ,2D color, I used Hex, #FB8144, Rotate left 90%m place over
right eye. Resize it 22WX7H. Flip this eyebrow horizontally to place
over the left eye. |
|
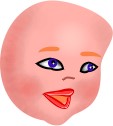 |
8. Face shading; Select the left eye,
ungroup, select the white piece, right click and convert object type
from text/path to image. Use the air brush, size; 10, color; black soft
edge; 50, darken all around the edges.. Do the same to the right eye on
the white part.
8A. Using the air brush, size;30, soft edge; 50,
color;#F08074, Shade down each side of the face and under the chin. Give
her some color on the cheeks.
Use the dodge tool, size;40, level 42, soft edge; 50, lighten her
forehead in the center. |
|

 |
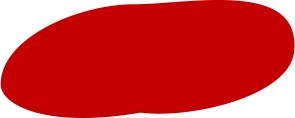
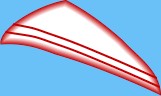
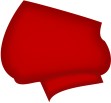
9. Hat brim; Ellipse shape, color;
#C40000, size; 280X121 Pixels, 2D. Use path edit and
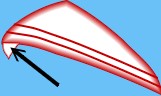
edit the shape like the example.. 9A. Hat Top; Using
the Half Circle shape, color; same as for brim, size;
148X56 Pixels, 2D. Click on edit to edit, place the
cursor on the bottom line, right click and convert to
curve. See example, when you have edited the shape,, use
perspective, click on rotate freely to rotate slightly
to the left. Send behind the brim. |
|
 |
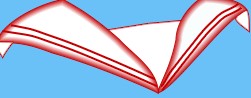
10. Hat shading' Select the hat brim,
right click and convert to an image. Use the paint
brush, size; 14, color;#700F0F, soft edge 100, go to
effect, creative, paint on edges. Use the blur tool with
the default settings and blur around the edge of the
brim. Send to back. Repeat for the hat top. |
|


 |
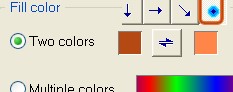
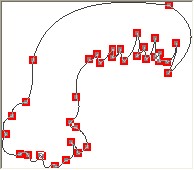
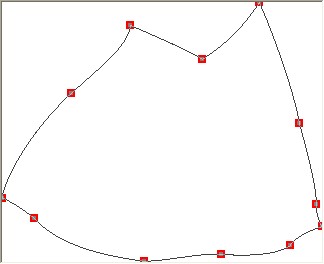
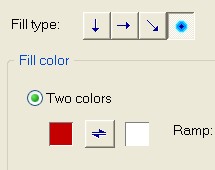
11. Hair; Use the ellipse again, size;
154X163 Pixels, click on the color box, go down to click
on gradient fill, two colors. #B44914 and #FF8648, use
the fill type, circle. Use path edit and edit the shape
as in the example, I had to add many points. You can use
mine as a pattern, take it into you PI and follow the
lines. You can always change her hair your own way. In
the material panel, change the border to; 26.
11A. Left side hair, draw another
ellipse, size; 41X38 Pixels, same two color gradient.
Edit the shape like you see at left. Send behind her
face. |
|
 |
12. Neck' Using ellipse size;98X51
pixels, color; #FFB1AA, 2D. Path edit the shape like in
the example. Click out of path edit and right click on
th4 neck, convert to an image. Use the air brush,
size;20. color;
#F08074, soft edge; 50, to shade under her chin and down
the side around the hair. Use the blur tool, default
settings; size; 20. soft edge' 50 and blend. |
|


 |
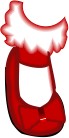
13.Dress Collar; Draw an ellipse,
siz3e;141X59 Pixels, 2D, I used a two color fill of;
#C40000 and white.. Go into path edit again, to edit the
shape like you see at left. Open the material panel and
set the border to 7. This is the left collar.
13A. Left collar trim. I used the line an arrow tool, 2D,
size 1, color; #C40000 and drew two lines across the
collar. Group or merge and send behind the hair
To complete the collar, draw a small ellipse in
the same two colors and edit the shape, see example.
Send to back 13B. Right collar, draw another
ellipse size;54X85 , Pixels, same color and edit the
shape like in the example. Draw another small ellipse
for the back of the collar like we did before. Trim this
left collar with the line and arrow tool. Send this
small shpe to the back. |
|


 |
14. Dress inset; Use shape A08, the same
two colors,#C40000 and white, size;90X85, flip
vertically, edit this piece to make it fit between to
right and left collars. Send this piece behind both
collars. |
|
 |
15. Main dress; Draw an ellipse, size;
199X249 pixels, I use red,#C40000, 2D. Click path edit
and make the shape like the example. Send behind the
collars and inset. At left is a small version of what
I have now. |
|


 |
16. Left sleeve; Using the same color
red #C40000, draw an ellipse, size; 83x71 pixels, 2D.
Edit this sleeve like in the example. 16A. Left sleeve
band; Using shape plaque 5, same red color, size; 55X22,
2D, flip vertically and edit for the sleeve band. Select
both pieces, send behind the collar.. |
|

 |
17. Right sleeve; Draw another ellipse,
size; 49X64, same color red, path edit like in the
example. 17A. Right Sleeve band; Use the same plaque 5
shape, size;19X25 Pixels, same red color, flip this one
vertically and edit. Select both pieces and send behind
thee collar. |
|
 
 |
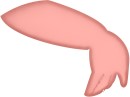
18. Left arm; Use the shape ellipse,
color;#FFB1AA,
size,98X43 Pixels, 2D and edit for her left arm. Send
behind sleeve band.
18A. Left hand; Same color, same shape, ellipse,
size; 39X58 and go into path edit again. See example at
left.
18B. Use the line and arrow tool,
2D, size; hairline, color;#C97167 to mark between the
fingers. You can see the example at left. |
|
 |
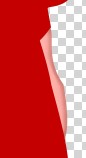
19. Right Arm; We can't see much of this
arm as it is hidden behind the dress. Use the same
color;#FFB1AA,
ellipse, 2D, size;33X110 pixels and edit the shape like
the one at left. Send to back. We will shade the arms
later. You can see a small example of where we are now,
at left.. |
|
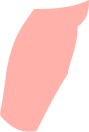 |
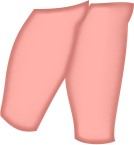
20. Left Leg; Use the ellipse, color;#FFB1AA,
2D, size;74X152 pixels, Edit this shape like you see at
left. Send behind dress, |
|
 |
21, Right Leg; Ellipse,. size' 57X179
Pixels, same color;
s#FFB1AA. Go into path edit to edit the shape like the
example at left. Send behink dress. |
|


|
22, Left Sock; first we will make the
ruffle top. I used, The same two color fill,
#C40000 and white. see settings at left. Draw an ellipse
size;74X54, 2D and edit the shape like you see left. It
doesn't have to be exactly like mine. Draw another
ellipse in the same two colors, size; 35X53 and edit the
shape .like in the example. Send behind the ruffle. |
|


 |
23. Left shoe; Using the ellipse,
color;#C40000, size; 56X85 Pixels, 2D, then edit the
shape like in the example. Send behind the ruffle.
23A. Shoe strap; Use the Plaque 5 shape, same color red
to make the strap for the shoe. Shape size; 35X16
Pixels, flip it vertically. and we must edit it
slightly.
23B. Shoe sole; Draw an ellipse, size; 44X75 pixels,
color black and edit the shape like in the example. Send
to back.
23C. Bow for the shoe; Using the rounded rectangle,
color; same red;#C40000,, 2D, size; 25X20 pixels. Use
the transform tool, perspective, close the right side of
the rounded rectangle and pull the left side out
slightly longer. Duplicate and flip it Horizontally slide over
to the left of the first one so that they meet. Draw another rounded rectangle, same color, size;5X16.,
place in the center of the two larger rounded
rectangles. Now change the smaller one to 3D trim.
Select all and group. Use the rotate freely to rotate a
bit to the left. Place the bow on the shoe like in the
example, ungroup, select the the two large pieces,
activate the paint brush, size 5, color;#850D0D, go to
effects on the menu, creative and paint on edges.
Note; Group the 3 shapes of the bow and duplicate to
save for the right shoe.
Select the large shape of the shoe, grab the paint brush
once again, size; 10, same color, #850D0D, paint on
edges. Next, select the strap, using the paint brush
change the size to;6, paint on edges. |
|

 |
24. Left Sock. Ruffle, using the
ellipse, size;78X31 Pixels, color; the two color fill,
#C40000and white, 2D, edit the shape like in the
example. 24A. With the same two color fill,
draw an ellipse, size;52X32 pixels, go into path edit
and edit the shape like you see at left. Send behind
ruffle. |
|


 |
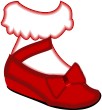
25. Right Shoe; Use the Ellipse shape,
size; 91X32 pixels, color; #C40000, 2D, edit the shape
like in the example. 25A. Heel; Draw another ellipse,
size;38X21 pixels, same color and edit this shape like
the example.
25B. Now for the strap, use the plaque 5 shape, same color size;
47X31 pixels, and edit the shape, see example at left.
Send behind the ruffle.
25C. For the opposite side of the shoe, use the line
and arrow tool, border size 3, the red color;#C40000, 2D,
to draw a line. See at left where I drew the line.
25D. Shoe Sole; using the ellipse, color black,
size;100X26 pixels, now edit the shape like in the
example.
235. Right Shoe Bow; Get out the duplicate bow and place
it on the shoe Using the transform tool rotate
freely, rotate slightly to the left, Now use the Resize
tool to make it smaller in size. You can see my example
at left. |
|
 |
26. The shading; Select the larger shoe
shape, using the paint brush, size; 10, color;
#850D0D, got to effects, creative paint on edges.
Next, select the strap, using the paint brush change the
size to;6, paint on edges. Select the line and arrow
shape on the opposite side of the shoe, right click,
convert to an image, use the burn tool, size; 20, level;
100, soft edge; 50 to darken. |
|
 |
27. Shading arms; Hold the control key
down, select the left hand, left arm and the two lines
we made with the line and arrow tool on the hand, merge
as a single object. Grab
the paint brush size; 7, soft edge; 100, color;#C76F65.
Next go to effects, creative and paint on edges. Using
the blur tool, size; 20, level 5, soft edge; 100 to blur
around the hand and arm. Now change the size to; 10,
level; 2, lightly blur the two lines on the hand. Send
behind the sleeve band. |
|
 |
28. Right arm; Select the right arm,
Using the paint brush, size;7, color; #C76F65 soft edge;
100, paint on edges. Use the blur tool, size; 15, level;
5, soft edge; 100 to blend the edge of the right arm. |
|
 |
29. Legs shading; hold the control
key again, select both legs. Use the paint brush, size;
10, color; #C76F65, soft edge; 100, paint on edges.
Deselect one leg. Use the blur tool, size; 30,
soft edge; 100 to blur the sides of the leg, Repeat for
the other leg. |
|
 |
30. Sleeve shading; Select the left
sleeve, set your paint brush to size; 20, color;
#850D0Dsoft edge; 100. Effects, creative, paint
on edges. Use the blur tool, Change to the blur tool,
size; 30, level; 5, soft edge; 100 and blur. 30A.
Select the left arm band. use the paint brush, change
the size to; 10, same color and same soft edge, paint on
edges and blur. Select both and merge as a single
abject, make sure it is still behind the collar. |
|
|
31, Right sleeve shading; Select the right
sleeve, use the paint brush, size; 15, soft edge; 100
and paint on edges. Select the right sleeve band, use
the paint
brush, change the size to 7, leave the rest of the
settings the same as before, same color and paint on
edges. Select both the right sleeve and right sleeve
band and merge as a single object. Send behind the
collar and blur. |
|
 |
32. Dress shading; Select the main dress
shape, use the paint brush, size; 20, color; #850D0.
soft edge; 100, paint on edges and blur. Using the air
brush, same color; size;20, soft edge 50, add a few
shadow lines down the from of the dress. Next, use the
dodge tool, size 20, level; 100, sift edge; 50 to go
between the air brush lines. Blur size' 82, level, 5,
soft edge; 50, but be careful, don't blur too much. You
can see how I did the shading at left. Your girl is
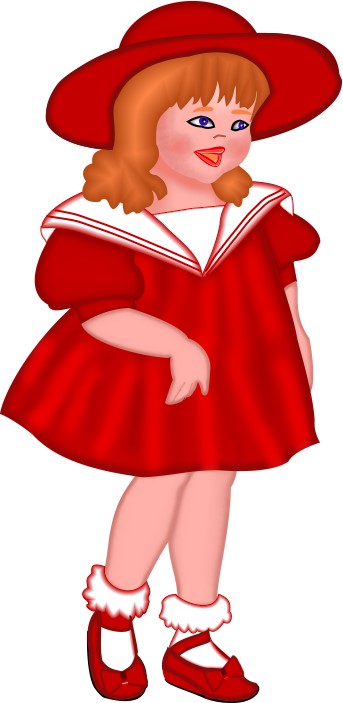
complete. I made a purse for her arm. |
|
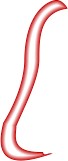 |
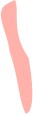
33, Purse; Purse strap, I used the
two color fill, #C40000 and white, size;30X158
ellipse, 2D. Edit like the example at left. |
|


|
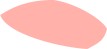
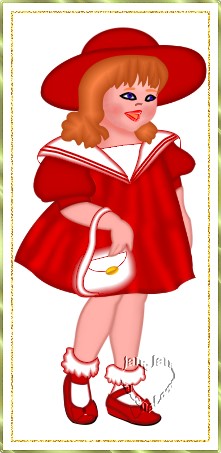
34.Purse front; Draw another
ellipse, same two color, size;92X75 Pixels. Go to path
edit and edit the shape like in the example. Send behind
the strap and hand. 34A. Purse flap. Using the
half-circle shape, same two colors, size; 68X29,
Flip vertically and put in place, you may have to resize
again to fit. Now using rotate freely, rotate to the
left a bit. Now using the ellipse, draw to
size;25X17 pixels/ I used a preset, gold3 from the
Material attribute gallery. Rotate freely to the left.
Send this one behind the hand.
Completed, hope you had fun. |
|
 |
|
 |
You may download the award on the left.
Which is my thanks for doing my Tutorial
Please do not link to
any of my graphics. Thank you.
|

