|
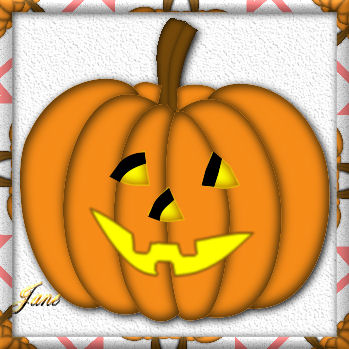
Halloween Pumpkin
This Tutorial is
Dedicated to Cellar!!
I am using Paint
Shop Pro Version 9. cam be dome in other versions as
well.
Bu
Jane's Haven
Email
Terms of Use
I am using
Selections, which you can get
Here.
Selections for PSP Version 7, here |
| 1.Open a new image size; 325X325,
transparent background. |
| 2.Add a new layer,
name it, stem1, load from disk, 01-stem1 Selection.
Flood fill with the color; #74480a. Float selection
and add a cutout with the settings below.
Vertical and Horizontal; 1
Opacity; 75
Blue; 8.91
Color; Black
Deselect. |
| 3.Add a new layer name it, stem2.
Load the 02-stem2 selection, flood fill with the same
color; #74480a. Float the
selection and
add the same cutout, except, change the vertical and
horizontal to minus 1. Deselect. |
| 4. Add a new layer, name it,
right back , load the 03-rightback selection. Flood fill with
color; #f68b18, float the selection and add a cutout with the
settings below.
Vertical and Horizontal; 2
Opacity; 75
Blur'9.00
Color; #513309
Repeat the cutout
but change the vertical and horizontal to minus 2.
Deselect. |
| 5.Add a new layer, name it,
left back, load from disk the 04-leftback selection.
flood fill with the same color;#f68b18 float the
selection and add the same
cutout as the last step, and the same repeat. Deselect. |
| 6.
Add a new layer, name it, right
side 1, load the 05-rightside1 selection, flood fill
with, the same color orange,#f68b18. Float the selection
and add a cutout with the following settings.
Vertical and
Horizontal; 3
Opacity; 100
Blur; 15.00
Color; #513309
Repeat the cutout
but change the vertical and horizontal to; minus 3.
Deselect. |
| 7. Add a new layer, name it,
right side 2, load from disk, 06-rightside2 selection.
Flood fill with the same orange color. Float selection
and add the same two cutouts as the last step. Deselect.
 |
| 8. Add a new layer, mane it,
left side 1, load from disk, 07-leftside1 selection.
Flood fill with the same color orange. Float selection,
repeat the same two cutout as in the last step.
Deselect. |
| 9. Add a new layer, name it,
left side 2, load from disk, 08-leftside2 selection,
flood fill with the same color orange, float selection and add the same
two cutout as in steps, 6.7. and 8. Deselect. |
| 10.Add a new layer, name it
middle 1, load from disk, 09-middle1 selection. Flood
fill with the same orange color, float the selection and add the same cutout
as shown in step 6, with the same repeat. Deselect. |
| 11. Add a new layer, name it
middle 2, load the, 010-middle2 selection, flood fill
with the same orange color float the se4lection and add the same two cutouts.
Deselect. |
| 12. Add a new layer, name it,
right eye 1, load from disk, 011-righteye1 selection,
flood fill with color; #ffff00. Float selection and add
a cutout with the following settings.
Vertical and horizontal; 1
Opacity; 95
Blur; 15.00
Color; #b26b06
Repeat the
cutout, except, change the vertical and horizontal to
minus 1
Deselect. |
| 13. Add a new layer, name it,
right eye 2, load from disk, 012-righteye2. Flood fill
with black. Deselect.
 |
| 14. Add a new layer, name it,
left eye 1, load from disk, 013-lefteye1 selection.
flood fill with the same yellow;
#ffff00. Float the selection, Add the
same cutout settings as we used for right eye1 in step
12. Deselect. |
| 15.Add anew layer, name it,
left eye 2, load from disk the, 014-lefteye2 selection.
Flood fill with black, Deselect. |
| 16. Add anew layer, name it,
nose 1, load from disk the, 015-nose1 selection, flood
fill with the yellow,
#ffff00. float the selection Add the
same, cutout as in step 12. See settings below.
Vertical and horizontal; 1
Opacity; 95
Blur; 15.00
Color; #b26b06
Repeat the
cutout, except, change the vertical and horizontal to
minus 1 |
| 17. Add a new layer, name it,
nose 2, load from disk the, 016-nose2. Flood fill with
black. Deselect. |
| 18.Add a new layer, name it,
mouth, load from disk the, 017-mouth selection. Flood
fill with ;#74480a. Go to selection, modify, contract by
2. Flood fill with; #ffff00, deselect but keep the mouth
layer hi-lighted. Go to adjust, blur with the setting
at; 3.. Halloween pumpkin is complete, unless you wan to
add something else, if so, add new layers.
To save as a tube, right click on a
layer and merge visible. |
|
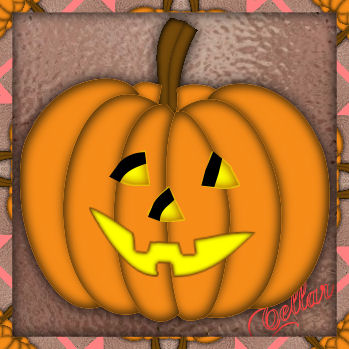
Thanks again to My Good Friend
Cellar. Your results are Perfect. |
© By Jane's Haven, All Rights Reserved.