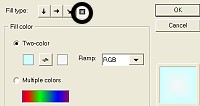
|
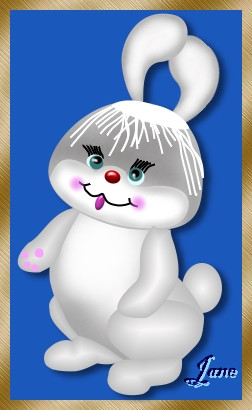
Bunny Rabbit Tutorial
|
Created with Ulead Photo Impact.
PI
Version-I am using version12,
I am certain it can be done in earlier versions, from PIXL on up to
PI12.
Skill Level: Intermediate
Author: Jane Davidson
Web Site:
Jane's Haven
Email
Terms of Use:
Here
Path drawing tool, paint on edges, blur, path
edit.airbrush,dodge tools.
|
|
Dont forget to save!!!! |
|
|
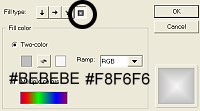
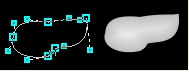
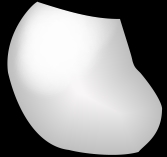
Step 1:Open
a new image any color you refer, it should be a dark color, size 300X425.
With the path drawing tool, ellipse, 2D size:153X123,
using the two color gradient fill and the direction is the circler, tick
the last one where indicated at left, colors:
#BEBEBE and #F8F6F6.
|
|
|
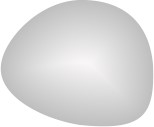
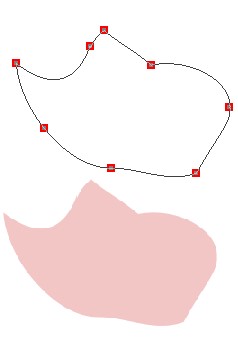
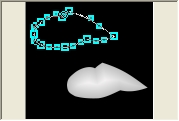
Step 2. Head: We have to change the shape a little by
going into path edit mode. Make the shape like the one on the left.
You can drag the image into PI and use it as a pattern. |

|
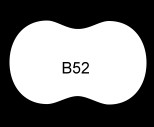
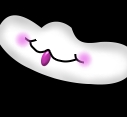
Step 3: Rabbit Muzzle:
Using shape B52, if your version is different than mine, I have an
example of the shape on the left. In 2D mode draw a shape size:139X64,
in white. Go into path edit mode to edit the shape as in the example at
left. Line it up with the bottom of the head as much as possible.
|


|
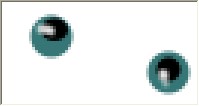
Step 4: Eyes: Draw two
ellipse in
2D,
one size: 17X14,for the left eye, the second ellipse size is:
17X17 for the right eye, in the two color gradient with the same directions checked.
Colors: #CFFFFF and #F8F6F6. See examples at left.
4a, Draw two circle shapes, 2D, color:#377676, one size:
14X14 and two more circles in color black, size:8X8.
4b. Using the paint brush, color white, size: 2, soft
edge: 50, paint in mode. Paint a very tiny line on the black circle,
drag the brush off the black circle and let a bit of the white fall on
the dark green. Note: One of my testers said they had to merge the two
circles to paint in mode...I have given you an example enlarged on the left. Click
out of paint mode, now you have another abject.
The image on the left is what we have at this point. |

|
Step 4b. Eye Lashes; Right eye; Using the Line and Arrow
tool, spline, with these settings; Color Black, size; 1; 2D. starting at
the edge of the top of the eye, click as many times as you need to give
it a small curve to the right. I made six lashes. Holding down the
control key select each one and group. Send them behind the eye pieces.
Do the same for the left eye, except curve then slightly to the left,
group and send them behind the eyes. See illustrations at left. |

|
Step 5; Nose; Draw an Ellipse, color; #9C210F, size;
16X13, 3D, Setting, open the materials adjustment variations, set the
width to as high as they will go or click smooth spine, if clickable,
the depth or "border" which ever one you have, to 30. Two lights, first
one direct and second one spot. Click ok and use the light bulb, with
light one active and place your cursor in the middle top of the nose.
Activate the transform tool
 ,
click on the attributes, rotate, and rotate slightly to the right, as his
head is slightly at an angle. ,
click on the attributes, rotate, and rotate slightly to the right, as his
head is slightly at an angle. |
|
 |
Step 6; Mouth; Lets give it a smile with the Line and Arrow Tool,
size; 1, color; black, spline. See the example at the left, give it a
couple of sort of vertical, curved. lines one on each side of the mouth.
A tiny tongue, with the ellipse, size: 9X16, color; #FF24D7, 3D,
material settings the same as for the nose, which should be the same
settings already there. Again use the transform tool, rotate freely, set
your cursor on the top right point of the tongue and rotate slightly to
the right. Send the tongue behind the mouth. See the example at left. |

|
Step7. Muzzle Shading; Convert to an image by right clicking the muzzle
and convert to an image, use the airbrush, color; #979696 size: 20,
transparency: 0, soft edge; 50, airbrush around the outside edges of the
muzzle. Use the blur tool to slightly blur around the outside edges. |
|

 |
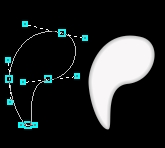
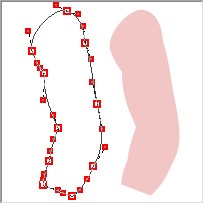
Step 8,Left Ear, Using shape S49, I have added an image of the
shape for those who have an earlier version of PI, size 42X90 colors;
two color gradient, #BEBEBE and #F8F6F6, the same
way we did for the head, 2D. flip vertically, go to path edit, use the
top point and pull it over to the right, pull the right side bottom node
inward and the right side top node out ward. If you look at the example
on the left you can see how it looks now.
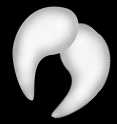
You may have to adjust the nodes a little more. Now use the airbrush
with the same settings,
color; #979696 size: 20, transparency: 0, soft edge; 50, convert to an
image, airbrush around
the outside edges of the ear. Now Blur. Duplicate and flip horizontally
and move it over to the the right. Use the transform, rotate freely,
rotate to the right. Send them both behind the head. |
 |
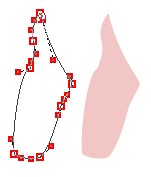
Step 9; Body; Ellipse, size; 113X148, color; the same as for the
ear, two gradient colors, 2D. Path edit mode to edit the shape like the
image at left, send it behind the head. |
  |
Step 10. Right arm; Ellipse size; 38X89,two colors; same settings as for the
body, path edit, see image at left. Step 11. Left arm, Ellipse,
the same size and color as the right arm, again use path edit to edit the
shape like the image at left. Draw four circles, color; #F9A3F9, first
circle size:9X9, the other 3 are size: 7X7 for the paws on the
left paw. group with the arem and send behind the body and head. |
  |
Step12. Right Leg, Using the same two color gradient, in 2D, draw
and ellipse, size;94X60, go into path edit the adjust the shape like in
the example. Draw another ellipse size: 76X45, for the actual foot. Go
into path edit to edit the shape like the example.
Click on the arm and bring it to the front of the leg. |

 |
Step 13. Left Leg and foot; draw and ellipse, the same setting as
before in size;49X65. path edit mode to edit the shape like the example
at left. Using the same setting for the left foot. Draw an ellipse
size;67X26, path edit to edit the shape like the example.
Send both of these to the back. |
|
 |
Step 14. Tail, Draw an ellipse size; 39X49 with the same settings,
place it at the back of his body for the tail. At left is what I have at
this point. |

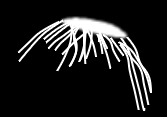 |
Step 15. Lets give it a little hair. Draw an ellipse, color; white,
size; 65X17, 2D, and edit the shape like in the example, convert to an
image, and set the
soft edge to 3. Place it at the very top of the head. 15a. Using the
Line and Arrow Tool, size; 1, 2D, color white, I started at the top of
his head and drew sprig-like hair hanging down over the forehead. They
don't have to be even, this rabbit is kind of a fun rabbit. Your doesn't
have to look exactly like mine.
When your satisfied with how it looks, select all of them, group and
send them under the first piece, the ellipse. |
|
 |
Step16. Finishing touches, To give it rosy cheeks, use the
airbrush, size;20. transparency;0, soft edge; 50. color;#E974E9, you can
either convert to an image or click on mode, click several times on the cheeks, until your satisfied. |
|
 |
Step 17, Select the body, right click and convert to an image. Use
the Dodge tool, with the settings below.

Lighten the chest area, about half way down. |
|
 |
Step 18. select the head, right click, convert to an image, and use the airbrush with these settings,
size; 50, transparency; 0, soft edge; 50, color;#817E7E to darken the
top part of the head from the muzzle to the top.
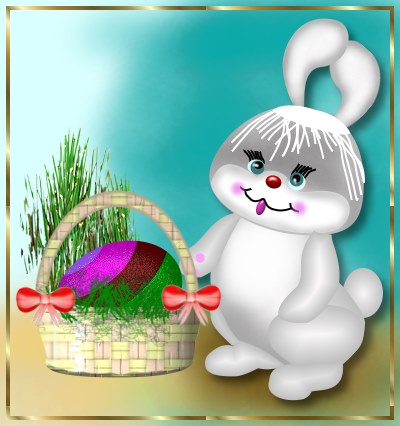
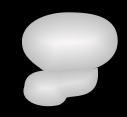
Your are finished. I added a basket and an egg to the
picture at the top of the page. You can add anything your heart desires. |
|
 |
After completing this Tutorial feel free to download
the award on the left.
This award is offered to you on the honor system. Right click and save
to your own folder. Please do not link to any of my graphics. Thank you.
|
|