|
Barely
Reflections TAG

Paint Shop Pro
Tutorial
I used Version X
but I am reasonably sure it can be done in many other
versions as well.
by
Jane's Haven
Contact Us
Terms of Use
Supplies Needed.
My supplies
here.
Optional, Lokas
Drop Shadow Filter,
Here
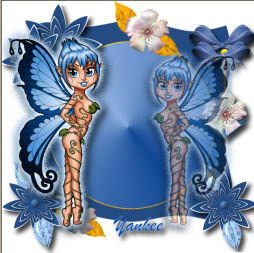
A tube of your
choice, the tube I used is the artwork of Joey Adams,
the site is now closed.
Unzip the
supplies to a folder of your choice.
|
| 1. Open the barely reflection
template, duplicate by holding the shift key and the D
key at the same time. Close the original template and
rename the duplicate and save. |
| 2.Nexr, rearrange the elements as
you would like them to be. |
| 3,Next, add your tube by copying
and pasting as a new layer, place it on
the left, you may have to resize, duplicate the tube and
go up to image on the top bar, in the drop down list
click on mirror. I resize my duplicate tube by 80
percent. On the layer palette reduce the transparency to
57 percent. |
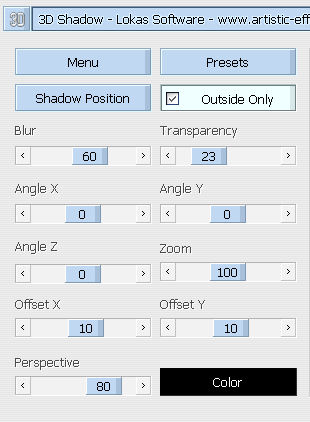
| 4. Add a drop Shadow to all layers
or where every you want. I used the Lokas 3D drop shadow
filter. Setting are below that I used.
  |
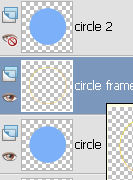
| 5.Now get ready to animate. Select
circle 1, by going to the layer paned and clicking on
circle 1 layer. Hide layer circle 2 by clicking on the
eye in the layer panel. On the top bar, go to
selections, select all, next, go to selections and click
float, then defloat. You should have the marching ants
around the circle 1 layer.
 |
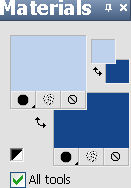
| 6. Go to the material
palette, change the foreground color to, #bed2ee and the
background color to, #16468b
 |
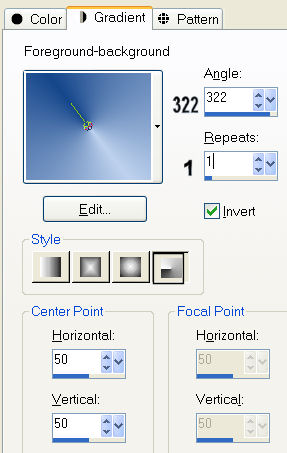
| 7. Left click on the foreground
color to open the material properties box and click on
gradient, go down to edit, when it opens click on the
words foreground-background, click ok, and use the
setting below.
 |
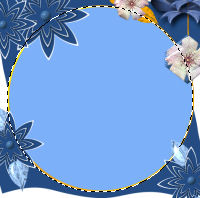
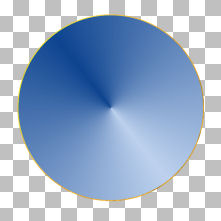
| 8. Use the flood fill tool to fill
circle 1 with the gradient. Next go to selections,
select none. In the layer palette right click on circle 1 layer
and then click on merge down. You merged down to the
circle 1 frame later. Circle 1 should now look like the
one below.
 |
| 9. Close the circle 1 layer, open
the circle 2 layer, repeat the steps we used to fill
circle 2. Before you fill circle 2 open the material
properties and change the angle to; 145.Right click on
circle 2 layer, and merge down with the circle frame 2
layer.
|
| 10. Add any copyright information,
including your own and your name. Open animation shop,
go
back to psp hide the circle 2 layer, go up to the top
bar, click edit, then copy merged. Go to Animation Shop
and go to edit, paste as a new animation.
Back to psp, hide the circle 1 layer,
open circle 2 layer. Again go to edit, copy merged and
back to AS, then, edit, paste after current frame. |
| 11. Next, , go to edit, select
all, then to animation, when the drop down menu
opens click on Frame Properties. In the delay time, set
it to 20. Now click View, and animation to view your
animation. If you are happy with what you see save as a
gif. you are finished. Hope you have enjoyed doing the
tutorial. |
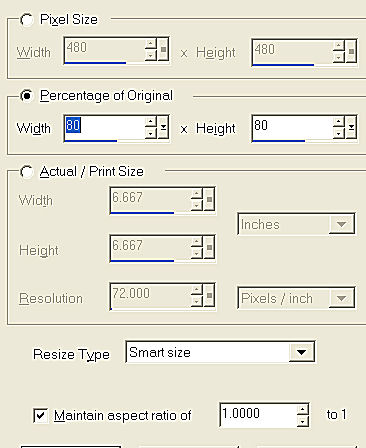
| 12. One more note, you can resize
the animation by going to edit, select all, after that,
click on animation, resize. An example of how I
resized, see below.
 |
©By Jane's
Haven, All Rights Reserved Except Where Otherwise Stated.