|
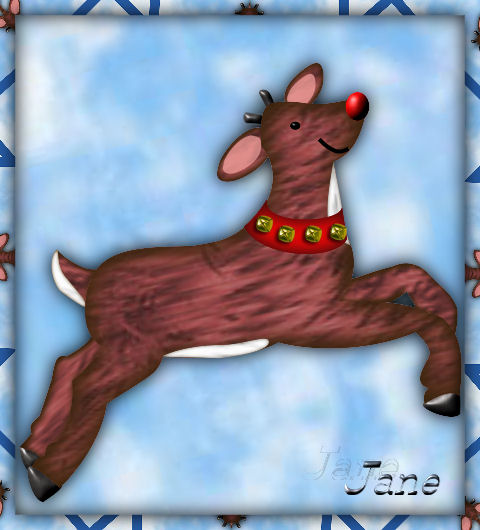
Rudolph Paint Shop Pro Tutorial
Using Version 9, most
likely can be done in other versions as well. Except for
Version 7, you can download tem
HERE
by
Jane's Haven
Contact Us
Get my Selections
Here.
Unzip them in a folder
of your choice.
My Bell Tube and
Patterns
HERE
|
|
Don't forget the save
often. |
|
|
|
Open the files provided in Paint
Shop Pro.and minimize. |
| 1.Open a new transparent image,
size;450X500 |
| 2.Add a new layer, name it, tail
1, load from disk the, 01-tail1 selection. Flood fill
with the deer fur pattern, first, open the material
properties, click on the pattern tab and find the,
J-deer fur and use the following settings, angle; 290,
scale; 250, now flood fill. Float the selection and add
a cutout with the following settings.
Vertical and Horizontal; 3
Opacity; 100
Blur' 8.00
Color; #38240a
Repeat the
cutout, changing the vertical and horizontal to minus 3.
Deselect. |
| 3. Add a new layer, name it,
tail 2, load from disk the, 02-tail2 selection. Open the
J-white fur pattern and find it in the material
properties, use these settings; angle 290, scale; 250
and flood fill. Invert selection and add a drop shadow
using the following settings.
Vertical and Horizontal; 0
Opacity; 100
Blur; 5.00
Color; #5a3a08
Deselect. |
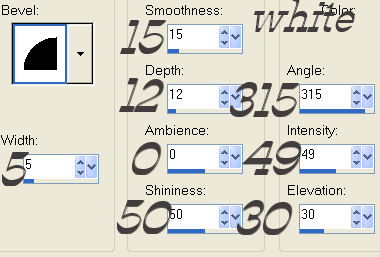
| 4, Add a new layer, name it, left
back hoof, load from disk the, 03-leftbackhoof. Flood
fill with color; #413d3d. Add an inner bevel with the
following settings, deselect.
.
|
| 5. Add a new layer, name it, left
back leg, load from disk the, 04-leftbackleg. Flood fill
with the J-deer fur pattern, changing the angle to; 231.
Float selection and add a cutout with the following
settings.
Vertical and
Horizontal; 3
Opacity; 100
Blur' 8.00
Color; #38240a
Repeat the cutout
changing the vertical and horizontal to minus 3
Deselect. |
| 6.Add a new layer, name it, right
back leg, load the, 05-rightbackleg selection. Flood
fill with the j-deer fur pattern, changing the angle to;
266. Add the same cutout as in step 5 and repeat cutout,
deselect. |
| 7.Add a new layer, name it, right
ear 1, load from disk the, 06-rightear1 selection, flood
fill with the deer fur changing the angle to;245. Float
selection and add a cutout with the same setting as in
step Vertical, change the Vertical and Horizontal to; 2. Repeat
the cutout change the vertical and horizontal to minus2.
Deselect. |
8. Add a new layer, name it, right
ear 2, load the, 07-rightear2 selection, flood fill with
color;#f5a39f. Deselect, we are going to change the
transparency, go to the layer palette and push the
slider over to the left until it reads ;73.
 |
| 9. Add a new layer, name it, left
ear 1, load from disk the, 08-leftear1 selection, flood
fill with the deer fur pattern, do not change the
settings. Float selection and add the same two cutouts
as in step 5, change the vertical
and horizontal to; 2.
Deselect. |
| 10. Add a new layer, name it, left
ear 2, load from disk the, 09-leftear2 selection, flood
fill with color;#f5a39f, deselect and reduce the
transparency to, 73, |
| 11. Add a new layer, name it, left
antler, load the, 010-leftantler selection, flood fill
with color; #413d3d and add the same inner bevel as in
step 4. deselect. |
| 12. Add a new layer, name it,
right antler, load the, 011-rightantler selection. Flood
fill with the same color as the last step and add the
same inner bevel as the last step. Deselect. |
| 13. Add a new layer, name it, left
back hoof 2, load the, 012-leftbackhoof2 selection.
Flood fill with color;#413d3d. Add the same inner bevel
as the last step, deselect. |
| 14.Add a new layer, name it, right
front hoof, load the, 013-rightfronthoof selection,
flood fill with the same color and add the same inner
bevel. Deselect. |
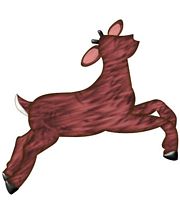
| 15. Add a new layer, name it, body head, load
the, 014-bodyhead selection. Flood fill with the deer
fur pattern, with the angle set at; 257. Float
selection, add a cutout with the following settings.
Vertical and Horizontal; 4
Opacity; 100
Blur; 34.00
Color; #38240a
Repeat the cutout, changing the
Vertical and horizontal to minus 4.
Deselect.
 |
| 16. Add a new layer, name it,
mouth, load the, 015-mouth selection, flood fill with
black and deselect. |
| 17. Add a new layer, name it,
front spot, load the, 016-frontspot selection, flood
fill with the white fur pattern with an angle setting
of;175, scale 250. Invert selection and add a drop
shadow with the following settings.
Vertical and Horizontal; 0
Opacity;75
Blur; 5.00
Color; #2c1c04
Deselect. |
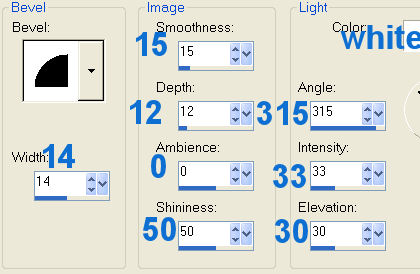
| 18. Add a new layer, name it,
eye, load the, 017-eye selection, flood fill with black
and add an inner bevel with the following settings.
deselect.
 |
| 19, Add a new later, name it,
nose, load the, 018-nose selection, flood fill with red
and add the same inner bevel as the last step. Deselect. |
| 20. Add a new layer, name it, underneath spot, load
the 019-underneathspot selection, flood fill with the
white fur pattern, change the angle to; 90. Invert
selection and add a drop shadow with the following
settings.
Vertical and Horizontal; 0
Opacity;75
Blur; 5.00
Color; #2c1c04
Deselect. |
| 21. Add a new layer, name it, neck piece, load the
020-neckpiece selection, flood fill with a red color.
Invert selection and add a drop shadow with the
following settings.
Vertical and Horizontal; 0
Opacity;100
Blur; 19.00
Color; #4f0b0b
Deselect.
|
| I placed some bell tubes across
the neck piece, which are provided for download.
To save as a picture tube, merge
visible, to add a background, hide the very last layer
in your layer palette and merge visible. |
|
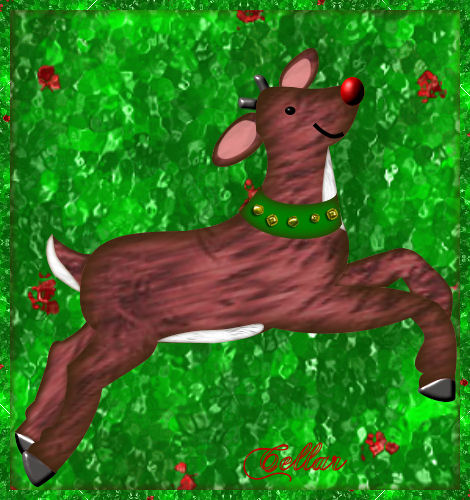
And to My Tester, Cellar, a Big
Thank You. Beautiful Work!!!
  © by Jane's Haven. All Rights reserved except where otherwise stated.
|