
This is what we are creating.
![]()
You will need.
You will need any version of Paint shop Pro
A tube of your
choice
I am using the beautifull Art of: Fiodorova_Maria You can purchase Here Pics For Design
Filters/Plugins
BG Kaliedoscope1--Download Here
Download Supplies Here
No one tested this, therefore, if there is a problem, email below.
Email Me Here
1. Open a new transparent image size 800X376. Change your foreground color to #adc5e8 and background color to #43679f, open the material palatte to gradient, style linear, angle 45, repeats 2, flood fill with the gradient. |
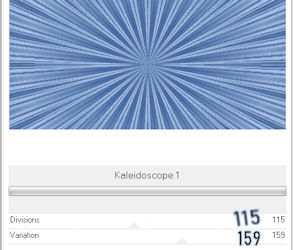
2. About the BG filter; mine is added to my filters unlimited, therefore, the image may look different, if your BG filter is not but the settings are the same. The settings are below
Click apply and close |
3. Open the top left design.psd image, place it at the top on the left, it already has a drop shadow, duplicate and mirror, arrange evenly. |
4. Open the bottomdesign.psd, arrange at the bottom, as you can see I added noise to both designs, setting 25. |
5. Place your main tube, resize if necessery, place where you wish and add your drop shadow. |
6. Activate the top layer, add a new layer, select all. Go to selections, modify, at the bottom of the pop out menu click select selections border, place an 3, click inside, then ok. Flood fill with one of your colors, I prefer the darker color.While selected, go to adjust, add remove noise, set at 25. |
7.Add the copyright if needed and your name.Save as a png. |
The Avatar. 8. I used the merged tag and resized it 50 percent, using the perset shape tool, circle,forground any color, background color null, set the width at 2. Now draw a circle around the face of the image. as big as you can without going ousite of the frame. Make sure the tag is activated in the layer palette.Now go to edit copy and paste as a new image, go to resize, pixels, resize 200x200, all layers checked, sharpen by using the adjust menu.
|
9. Still on the avatar, If it is too close to the edges all around, resize by 95%, all laoyers not checked, as to add a border. Use the preset shape tol again, with these settings. Forground color,#8bb1de. background color #0b1f55, open the material palette to click on gradient, set the angle to 45, repeats to 4, on the shape menu move the width to 5 and hide the background color and backi to the working image drag out a circle around the image. With circle drawn, go to the layer palette and and right click on the vector layer and change to raster.. Now you can resize the circle for a frame. Below is the preveiw.
|
10. Next is the copyright on the avatar, I uosed Londonderry Air NF font, size 12, forground null, background black. After adding the copyrigt I found it was too smaill,,went to reize,105%. Arange tihe text off to the edge, so it can be read. You can add your name or inital . Save as a pmg. |
|
|

