|
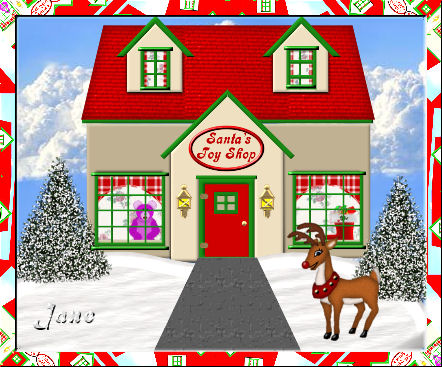
Santa's Toy Shop Paint Shop Pro
Tutorial
Using Version 9, most
likely can be done in other versions as well. Except for
Version 7, you may download them
Here
by
Jane's Haven
Contact Us
Terms of USe
Get my Selections
Here.
Unzip them in a folder
of your choice.
Pattern fills,
and all images
HERE
Don't forget the save
often. |
|
Open all pattern
fills and images in PSP. |
| 1.Open a new transparent image,
size;412X337. |
| 2.Add a new layer, name it, bottom
inside wall, load from disk the, 01-bottominsidewalls,
flood fill with a pattern of your choice or use my
toy shop wall pattern, with setting; angle; 0, scale;100
Deselect. |
| 3. Add a new layer, name it,
bottom curtains, load the, 02-bottomcurtians, I used my
curtain rill, with an angle of; 0, scale of; 100.
Deselect. |
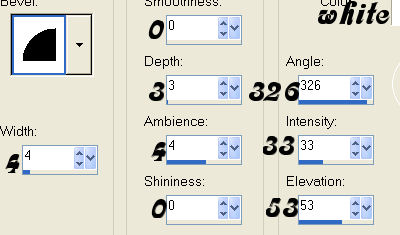
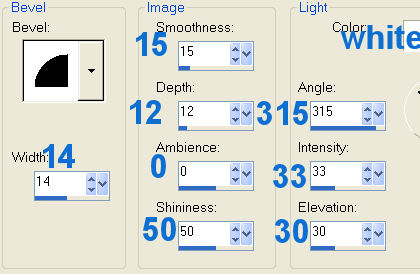
| 4, Add a new layer, name it, under
roof, load the, 03-underroof, flood fill with color;
#4a6351. Add an inner bevel with the following settings.
Deselect.
|
| 5. Add a new layer, name it, roof,
load from disk, 04-roof selection, flood fill with the
roof fill provided, use these settings, angle 0, scale,
100. Invert and add a drop shadow with
the following settings.
Vertical and Horizontal; 0
Opacity; 100
Blur; 18.00
Color; #650505
Deselect. |
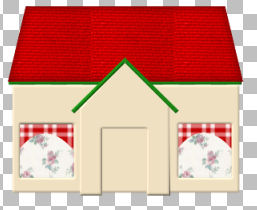
| 6. Add a new layer, name it, front
wall, load the, 05-frontwall selection and flood fill
with color;#ddceb3. Add the same inner bevel as in step
4 and deselect. |
| 7. Add a new layer, name it, front
wall 1, load from disk the, 06-frontwall1 selection and
flood fill with color; #ddceb3. Add the same inner bevel
and deselect. |
| .8. Add a new layer, name it,
middle v, load from disk the, 07-middlev and flood fill
with color; #197e14. Add the same inner bevel as in step
4. Deselect.
 |
| 9. Add a new layer, name it, door,
load from disk the, 08-door, flood fill with color;
#c00000. Add an inner bevel with the following settings.
Deselect.
|
| 10. Add a new layer, name it,
door frame, load the,09-doorframe, flood fill with
color; #197e14 and add the same inner bevel. Deselect. |
| 11.Add a new layer, name it, door
window cross, load from disk the, 10-doorwindowcross,
flood fill with color; #197e14 and add the same inner
bevel. Deselect. |
| 12. Add a new layer, name it,
top inside wall, load from disk the, 11-topinsidewall,
use the toy shop wall pattern, settings, angle; 0,
scale; 100. Deselect. |
| 13. Add a new layer, name it,
top curtains, load the, 12-topcurtians selection and
flood fill with the curtain pattern, same settings. Deselect. |
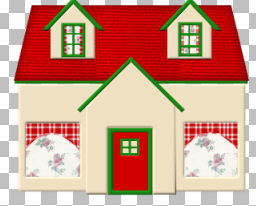
| 14. Add a new layer, name it,
top walls, load the, 13-topwalls, flood fill with color;
#ddceb3. Add the same inner bevel as step 9. Deselect. |
| 15. Add a new layer, name it,
top window cross, load the, 14-topwindowcross, flood
fill with color;#197e14. Add the same inner bevel and
deselect. |
| 16. Add a new layer, name it,
door window frame, load the, 15-doorwindowframe, flood
fill with color;
#197e14. and add the same inner bevel. Deselect. |
| 17. Add a new layer, name
it, top window frame, load the, 16-topwindowframes,
flood fill with the green;
#197e14., add the same inner bevel as in step 9.
Deselect. |
| 18. Add a new layer, name it,
top v, load from disk the, 17-topv's, flood fill with
green;
#197e14 and add the same inner bevel. Deselect.
 |
| 19. Add a new layer, name it,
bottom window cross, load from disk the,
18-bottomwindowcros, flood fill with the green color and
add the same iner bevel as in step 9. Deselect. |
| 20. Add a new layer, name it,
bottom window frames. load the, 19-bottomwindowframes. Flood fill with the same color
green and add the same inner bevel. Deselect. |
| 21. Add a new layer, name it,
door ledge, load from disk the, 20-doorledge, flood fill
with the same green and add an inner bevel using the
settings below.
Deselect.
 |
| 22. Add a new layer name it,
left top ledge, load the, 21-toopleftledge, flood fill
with the green and add the same inner bevel as in the
last step. Deselect. |
| 23. Add a new layer, name it,
top right ledge, load the, 22-toprightledge, flood fill
with the same green and add the inner bevel as in the
last step. Deselect. |
| 24. Add a new layer, name it,
left bottom ledge, load the, 23-leftbottomledge, flood
fill with the green color;#197e14 and add the same inner
bevel as in step 21, deselect. |
| 25. Add a new layer, name it,
right bottom ledge, load the, 24-rightbottomledge. Flood
fill with the same color green and add the same inner
bevel as in step 21, deselect.
|
| 26.Add a new layer, name it,
door hinge, load from disk the, 25-doorhinge. Open the
door hinge image and go to edit, copy and back to the
main image, go to edit, past, paste into selection and
deselect. |
| 27. Add a new layer, name it,
sign, load the, 26-sign flood fill with color; #c00000,
add the same inner bevel as in step 21 and deselect. |
| 28 Add a new layer, name it,
door knob, load from disk the, 27-doorknob. Open the
door knob image, go to edit, copy, go back to the main
image, go to edit, paste, paste into selection and
deselect. |
| 29. Add a new layer, name it, text,
load the, 28-text, flood fill with the red color;
#c00000 and deselect.
|
| 30. Add a new layer, name it ,lanterns,
load the,29-lanterns selection. Open the laterns image
and click copy and got to edit again and click paste
into selection and deselect. |
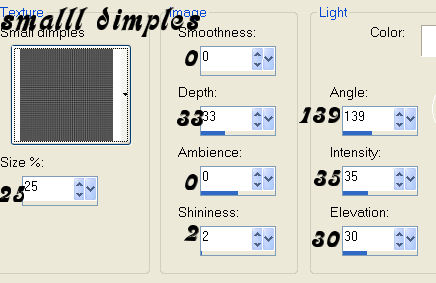
| 31. Add a new layer, name it
sidewalk, load from disk the, 30-sidewalk. Flood fill
with color; #c0c0c0, go to effects, texture effect,
texture, with these settings. Deselect.
 |
|
32. In the layer
palette, hi-light the front wall layer, go to
adjust, brightness and contrast use a setting of,
brightness minus 20, contrast 0
|
| 33. In the layer palette,
hi-light front wall 1 and add a drop shadow with the
following settings.
Vertical and Horizontal; 1
Opacity; 65
Blur; 3.00
Color; Black
Repeat the drop
shadow, changing the V and H to minus 1. |
| 34. In the layer palette,
hi-light top wall layer and add the same two drop
shadows. |
|
To add a tube or etc, in the
windows, do not merge the back inside wall layer, hide
them and then merge visible. |
|
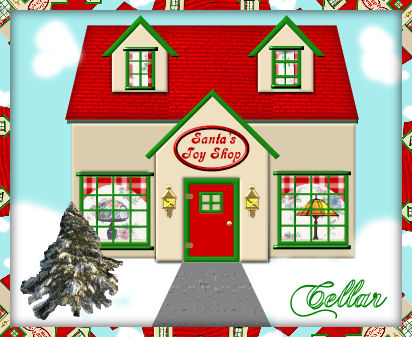
A Huge Thank You to My Friend
Cellar for Testing this for Me. It is perfect, Cellar. |
© by Jane's Haven. All Rights reserved except where otherwise stated.