|
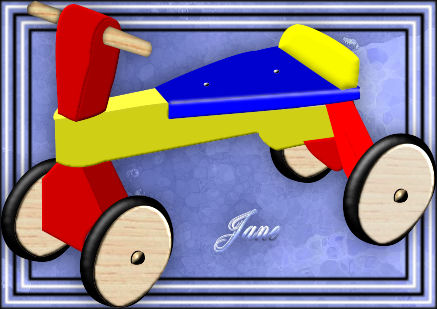
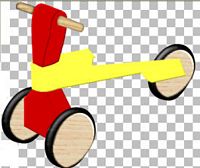
A Trike
Tutorial for Paint Shop Pro, I am using Version 9. I am
reasonably sure it can be done in other versions as well
By
Jane's Haven
Email
Terms of Use
We are using
Selections which you can get
Here
I am providing a
wood pattern, get it Here.
My inner bevel
presets
Here. Unzip the presets to your Paint Shop Pro
Presets Folder.
Unzip them to a
folder of your choice or in your PSP Selections folder.
Save Often!!! |
| 1. Open a new transparent image,
size;437WX309H.Open the wood pattern and minimize. |
| 2. Add a new layer, name it; right
back wheel, load the 1-rightbackwheel selection and
flood fill with black. Go to effects/3D effects/inner
bevel. When it opens go to the top where it says,
presets, down the list to find my, Jasc-Round.preset,
and click ok. Deselect.
|
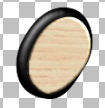
| 3. Add a new layer and name it; right back
wheel2, load the 2-rightbackwheel2 Selection. In your
material palette, click the pattern icon, see below,
open the material palette properties window, find my
wood pattern in the pattern window, flood fill
with the wood pattern With the angle 0, scale; 100, or a
pattern of your choice. Open your inner bevel to find
the, JH-WoodWheel preset, click ok. Deselect.

 |
| 4. Add a new layer, name it, left
front wheel, load the, 3-leftfrontwheel selection, flood
fill with black, use the same inner bevel as we did in
step 2, which is the
Jasc-Round.preset. Deselect. |
| 5. Add a new layer, name it, left
front wheel 2, load the 4-leftfront wheel2 selection,
flood fill with the wood pattern. Giving it the same
inner bevel as in step 3, the JH-WoodWheel.preset, and
click ok. Deselect |
6. Add a new layer, name it, left handle, load the
5-lefthandle sel, flood fill with the wood pattern,
angle; 0, scale; 100. Invert
 and add a drop shadow with these settings.
Vertical; 0, Horizontal; 0
Opacity; 69
Blur; 7.92
Color; Black
Deselect. |
| 7. Add a new layer, name it,
bottom front, load the 6-bottomfront sel, flood fill
with color of your choice, I used a red, #c00000. Add
the JH-TrikePlasic inner bevel preset. Deselect.
 |
| 8. Add a new layer, name it,
bottom front 2, load the 7-bottomfront2 selection, flood
fill with the same color red or your choice. Use the
same inner bevel,
JH-TrikePlasic. Deselect. |
| 9. Add a new layer, name it cross
brace, load from disk, 8-crossbrace. Flood fill with, I
used a yellow; #ffff40 or color of your choice. Add the
same inner bevel,
JH-TrikePlasic. Deselect. |
| 10. Add a new layer, name it side
cross brace, load the 9-sidecrossbrace selection. Flood
fill with the same yellow, #ffff40 or the color you
choose and add the same inner bevel,
JH-TrikePlasic. Deselect. |
| 11. Add a new layer, name it, top
side, load the 10-topside sel from disk, flood fill with
the red #c00000 or your color and add the same inner
bevel, JH-TrikePlasic.Deselect.
 |
| 12. Add a new layer, name it top
front, load the 11-topfront selections from disk, flood
fill with the red; #c00000 or your color, add the
inner bevel, JH-TrikePlasic. . Deselect. |
| 13. Add a new layer, name it right
handle, load the 12-righthandle sel from disk, flood
fill with the wood pattern, angle; 10, scale; 100.Invert
selection and add
the same drop shadow as in step 6. Deselect. |
| 14. Add a new layer, name it, left
front wheel, load the 13a-leftfront wheel sel, flood
fill with black. Add the inner bevel,
Jasc-Round.
Deselect. |
| 15. Add a new layer, name it left
front wheel 2, load from disk, 13-leftfrontwheel2 sel.
Flood fill with the wood pattern but first change the
angle to; 0 again. Add the inner bevel,
JH-WoodWheel. Deselect.
 |
| 16. Add a new layer, name it, left
front wheel bolt, load from disk the
14-leftfrontwheelbolt selection. Flood fill
with black, add the, Jasc-Round inner bevel.
Deselect. |
| 17. Add a new layer, name it, left
front wheel bolt 2, load from disk the
15-leftfrontwheelbolt2 sel. Flood fill with the wood
pattern, angle; 0, scale; 100. Add the Jasc-Round inner bevel. Deselect. |
| 18. Add a new layer, name it back,
load the 16-back selection, flood fill with the red
#c00000 or your color, add the
JH-TrikePlasic inner bevel . Deselect. |
| 19. Add a new layer and name it,
back 2. load from disk the 17a-back2 selection. Flood
fill with the red and add the
JH-TrikePlasic inner bevel. . Deselect. |
| 20.Add a new layer, name it, back 3, load the
17-back3 selection, flood fill with the red, add the
same inner bevel
JH-TrikePlasic. Deselect. |
| 21. Add a new layer, name it seat
1. load from disk the 18a-seat1 sel, flood fill with, I
used a bright blue; #0000ff, add the same inner bevel,
JH-TrikePlasic.
Deselect. |
| 22. Add a new layer, name it, seat
2, load from disk the 18-seat2 selection, flood fill
with the same blue, add the same inner bevel,
JH-TrikePlasic Deselect. |
| 223 Add a new layer, name it, seat
back, load the 19-seatback sel, flood fill with, I used
the same yellow we have already used, #ffff00 and add an
inner bevel JH-SeatBack preset. Deselect.

|
| 24. Add a new layer, name it,
right back wheel 1, load from disk the
20-rightbackwheel1. flood fill with black and add the
Jasc-Round
inner bevel. Deselect. |
| 25. Add a new layer, name it,
right back wheel 2, load the 21-rightbackwheel2 sel.
Flood fil with the wood pattern. Add
the JH-WoodWheel inner bevel. Deselect. |
| 26. Add a new layer, name it,
right back wheel bolt 1, load the
22-rightbackwheelbolt1, flood fill with black and
the Jasc-Round . Deselect. |
| 27. Add a new layer, name it,
right back wheel bolt 2, load from disk the, 23-
rightbackwheelbolt2, flood fill with the wood
pattern and use the same inner bevel as in the last
step, the Jasc-Round. Deselct. |
| 28. Add a new layer, name it, seat
bolts, load from disk, 24-seatbolts sel, flood fill with
white, add the same inner bevel as the last step.
Deselect. |
| 29. Add a new layer, name it, seat
shading, load the 25-seatshading selection, flood fill
with white. Deselect. Go to adjust, blur, average, set
to; 3. |
| 30. Add a bit of shading, hi-light
layer, side cross brace, go to adjust,
brightness/contrast, set the brightness to; minus 48 and
contrast; 0. In the layer
palette hi-light layer, top side, use the brightness and
contrast again, with the same settings.
Hi-light the seat 1 layer and
give it the same brightness and contrast settings.
Hi-light the bottom front 2 layer,
use the same settings for the brightness and contrast.
Hi-light the back layer, use the
brightness and contrast with the same settings.
If you want to save it as a tube,
fight click in the layer palette on one of the layers,
merge visible. If you used a colored background layer,
delete it first, before you merge. You can also save as
a psd file and use it in many graphics programs..
Your trike is ready to play with
you. |
|
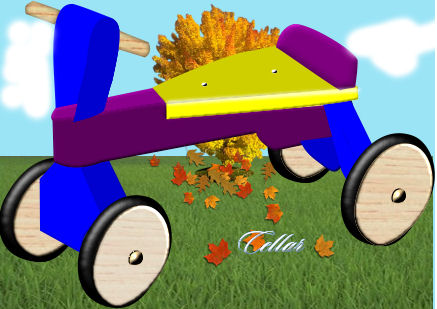
Many Many thanks to my Friend Cellar.
She used her own colors, I like it. |