|
Christmas Bell Paint Shop Pro
Tutorial
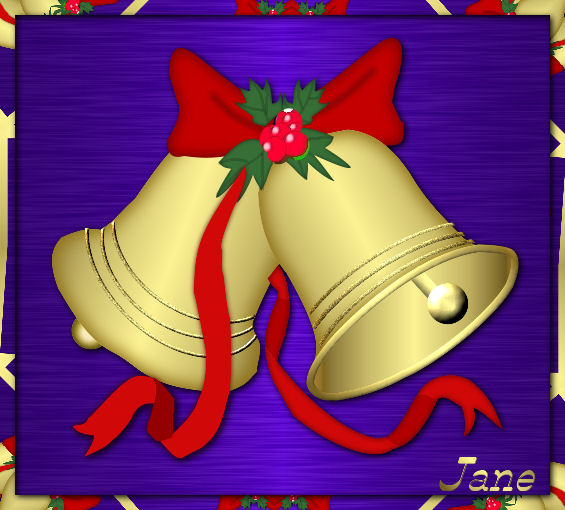
Using Version 9, most
likely can be done in other versions as well. Except
version,7 you can download those selections,
here
by
Jane's Haven
Contact Us
Get my Selections
Here
My Gold Gradient
and Berries Image
Here.
Place the gradient in
your gradient folder, open the berries in PSP.
Unzip the
selections in a folder
of your choice.
Don't forget the save
often. |
| 1.Open a new transparent image,
size; 565X510. |
| 2.Add a new layer, name it,
left bal, load the, 01-leftballl selection. Flood fill
with the Gold Gradient provided with these setting, repeats;
0,
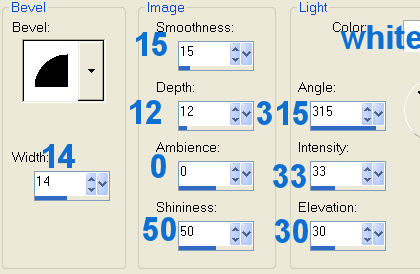
use the sunburst style with invert unchecked. Add an
inner bevel with the following settings. Deselect.
 |
| 3. Add a new layer, name it,
right bow, load the, 02-rightbow selection, flood fill
with color; #c40000. Invert selection and add a drop
shadow with the following settings.
Vertical and Horizontal; 0
Opacity; 100
Blur; 22.00
Color; #540202
Deselect. |
| 4, Add a new layer, name it,
right bow shading, load the, 03-rightbowshading
selection, flood fill with; #640606. Deselect and go to
adjust blur, average, with a setting of,9. |
| 5. Add a new layer, name it, left
bell top, load the, 04-leftbelltop selection, flood fill
the the gold gradient provided or a gradient of your
choice, use the following settings in the material
properties, angle; 110, repeats;
0, style; liner, invert; not checked. Float selection and add a cutout
with the following settings.
Vertical and Horizontal; 2
Opacity; 100
Blur; 27.00
Color; #92741a
Repeat the cutout,
changing the vertical and horizontal to, minus3.
Deselect. |
| 6. Add a new layer, name it, left
bow, load the 05-leftbow selection, flood fill with;
#c40000. Invert and add the following drop shadow.
Vertical and Horizontal; 0
Opacity; 100
Blur; 22.00
Color; #540202
Deselect. |
| 7.Add a new layer, name it, left
bow shading, load the 06-leftbowshading selection. Flood
fill with; #640606.Deselect and go to adjust, blur,
average, with a setting of; 9. |
| 8. Add a new layer, name it,
right ribbon 1,load the, 07-rightribbon1 selection,
flood fill with; #d00808. Deselect and go to adjust,
brightness and contrast, use a setting of, brightness;
minus 30, contrast; 0. |
| 9. Add a new layer, name it, right
ribbon 2, load from disk the, 08-rightribbon2, flood
fill with the same red color and deselect. Click on the eyes to close all
layers except the two right ribbon layers, Merge visible Now go to
selections, select all, then float, then defloat, Invert and
add a drop shadow with the following settings. Name this
layer, right ribbon.
Vertical and Horizontal; 0
Opacity; 100
Blur; 8.00
Color;#540202
Deselect
|
| 10. Add a new layer, name it,
right bell top, load the, 09-rightbelltop selection,
flood fill with the gold gradient, angle; 52, repeats;
0, invert; not checked ,style; linear. Float selection
and add a cutout with the
following settings.
Vertical and Horizontal; 2
Opacity; 100
Blur; 27.00
Color; #92741a
Repeat the cutout,
changing the vertical and horizontal to, minus 2.
|
| 11.Add a new layer, name it, leaf
1, load the, 010-leaf1 selection, flood fill with;
#366e36. Invert selection and add a drop shadow with the
following settings.
Vertical and Horizontal; 0
Opacity; 100
Blur; 5.00
Color; #162816
Deselect. |
| Steps 12-13-14. For these next
three steps, repeat the above. Adding anew layer for
each leaf. First loading the, 011-leaf2, next,012-leaf3 and
013-leaf4. Add the same drop shadow for each leaf. |
| 15. Add a new layer, name it,
leaf shading, load the, 013a-leafshading selection.
Flood fill with color; #203a20, deselect and go to
adjust, blur, average with a setting of; 3.
|
| 16.Add a new layer, name it, right
bell bottom, load from disk, the, 014-rightbellbottom
selection, flood fill with the gold gradient angle; 90.
Deselect.. |
| 17. Add a new layer, name it,
right trim 1, load the, 015-righttrim1 selection, flood
fill with the gold gradient, in the material properties
use these settings, linear style, angle; 90, repeats; 0,
invert unchecked. Add an inner bevel with the following
setting. Deselect and go to adjust, add noise, add noise, with
these settings; uniform, 30 and monochrome checked.
|
| Steps. 18, 19. For the next 2
steps, repeat the above, loading first the,
016-righttrim2 selection, then the, 017-righttrim3. Add
anew layer for each selection, flood fill and add an
inner bevel and add noise. |
| 20. Add a new layer, name it,
right stem, load the, 018-rightstem selection, flood
fill with the gold gradient, change the angle to; 37.
Add the same inner bevel as in step 17 changing the
angle to; 20. Deselect. |
| 21. Add a new layer, name it,
right ball, load the, 019-rightball selection, flood
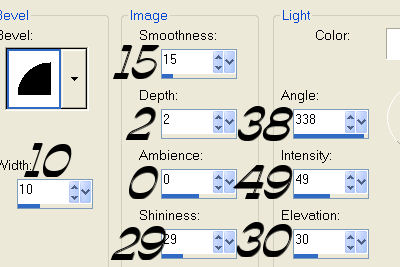
fill with the gold gradient, same settings and add an inner bevel using
the Round Preset. If you don't have the round preset see
settings below. Deselect.
|
| 22. Add a new layer, name it,
left trim, load the, 020-leftttrim1 selection, flood fill
with the gold gradient, change the angle to; 126. Add
the same inner bevel as in step 17. Go to adjust, add
noise, add noise, with these settings; uniform, noise;
30, monochrome checked. Deselect. |
| Steps 23 and 24. Repeat the
last step for the next two selections, which are,
021-kefttrun2 and 022-lefttrrim3. |
| 25. Add a new layer, name it,
right trim 4, load the 023-righttrim4 selection, flood
fill with the gold gradient, change the gradient
angle to; 221. Add the same inner bevel as in step 17.
Deselect. |
| 26.Add a a new layer, name it,
left ribbon 1, load the, 024-leftribbon1 selection,
flood fill with color;
#d00808 and deselect, |
| 27. Add a new layer, name it,
left ribbon 2. load the 025-leftribbon2 selection, flood
fill with the same red color red and deselect. Go to
adjust, brightness and contrast with the following
setting; brightness; minus 30, contrast; 0. In the layer
palette, click on all
the eyes except the two left ribbons layers and merge
visible. Name layer, left ribbon. Go to selections,
float and defloat and add a drop shadow with the
following settings.
Vertical and Horizontal; 0
Opacity; 100
Blur; 8.00
Color;#540202
Deselect
Don't forget to
view all layers.
|
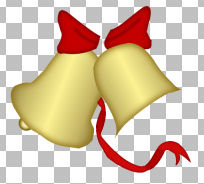
| 28. Add a new layer, name it
berries, load the 026-berries selection, open the
berries provided and copy, go back to the main image and
past into selection. Deselect. Your Christmas Bell is
complete. |
| To save as a picture tube,
merge layers visible. if you want to add a background,
hide the background layer, which is the very last layer
at the bottom, and merge visible. To save as a jpg, go
to file, export, JPG optimizer, I use the wizard. |
|
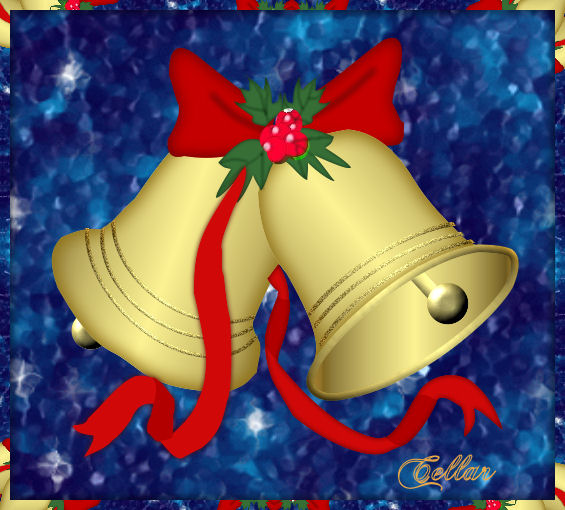
A Huge Thank You Goes Out to My
Special Friend, Cellar. Beautiful Results. |
© by Jane's Haven. All Rights reserved except where otherwise stated.