|
Dream Tag Paint Shop
Pro


Created in Version
X, I am reasonably sure it can be done in other versions as will.
Supplies
I have included all
the files you need in this
ZIP
Place the gradient
in the PSP gradient folder. In Step 8, have have explained how to import
brushes.
Feel free to use
your own.
Filter- Alien Skin
Xenofex 2. You can download a trail version
here
Questions?
|
1. Open a new
transparent
image, size
700X600 pixels. |
|
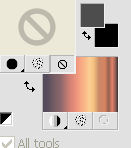
2. Flood fill
with the
gradient
provided,
sunset, angle,
0, repeats, 0,
style, linear. |
|
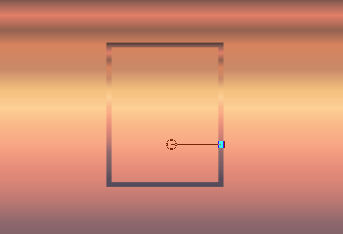
3. Find the
presets shapes
tool, rectangle,
using the
settings below.
Set the
foreground to
the same
gradient,
background,
null, draw a
rectangle large
enough to hold
your tube and
another
duplicate.
Center the
frame, move it
up a bit. In the
layer palette,
right click,
promote to
raster layer.

 |
|
4, Activate the
tube you are
going to use,
copy, and paste
inside the
frame, resize if
you must.
Duplicate and
mirror, place
them side by side
in the frame. |
|
5. Duplicate
the frame, place
it on the right
and down a bit.
resize it to
place another
tube into the
frame, I used a
man tube
included in the zip. Copy and paste the man tube in the frame. |
|
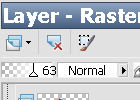
6. Using the
preset shape tool set on rectangle, in the material palette,
make sure the foreground color is null, background color is set
with the sunset gradient, open the properties and set the angle
to 90. Now draw a rectangle over the man tube just inside the
frame. In the layer palette, push the opacity to around 63
 |
|
7.In
the layer palette, close all the layers by clicking on the eye,
except leave the man tube, his frame and overlay. Merge visible.
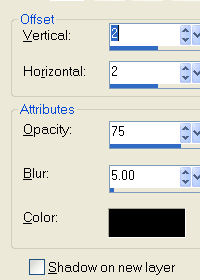
duplicate and mirror, line this up on the left. Add a drop
shadow with the settings below. Repeat the drop shadow changing
the V and H to minus 2. Drop shadow the other two frames also.
 |
|
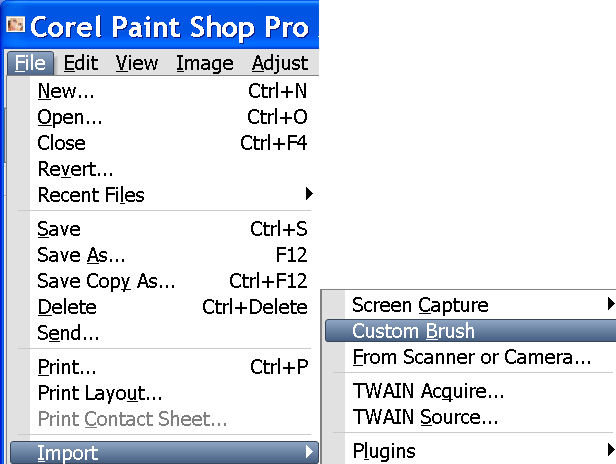
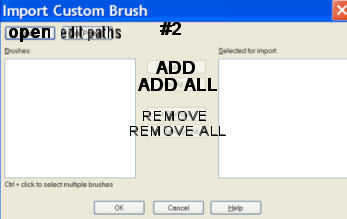
8. Included
in the zip are custom brushes, Unzip them. go to file, import,
import custom brushes. When you click on custom brushes another
window will open, see illustration 2. Click the open button,
bourse to the folder where you saved the brushes, click on them
while holding down the control key. click ok, your will see them
on the left window. Again hole down the control key, click on
both of them, click on add all and click ok. They should be in
your brushes folder and ready to use.
  |
|
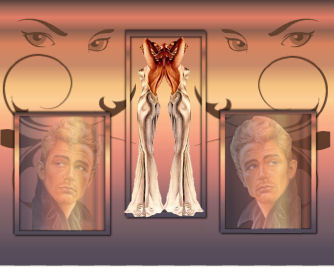
9. Add a new
layer above the bottom layer in the layer palette. Click on the
paint brush tool. Go to the material palette, foreground set to
#64422e. Go to the top bar, open the brush window and find the
JH-dream brush. Set the size to; 500, click on the image to the right, duplicate and mirror.. Add a new layer, got to
paint brush and find JH-eyes size; 200 and click on the left
side of the image at the top. duplicate and mirror.
 |
|
10, Make
sure you are on the top layer. Open the gold frame, click copy,
on the main image, click paste as a new layer, center the frame.
You will have to use the resize tool to make it larger.
|
|
11. Go to
selections, select all, got to selections, modify, contract by
5, invert add a new layer flood fill with the gold pattern
enclosed in the zip, select none. |
|
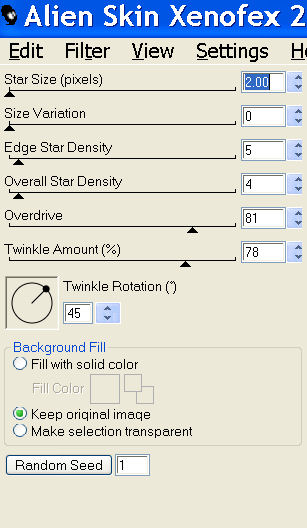
12. Add your
name and copyright, we are going to use the Alien Skin Xenofex,
constellation filter. |
|
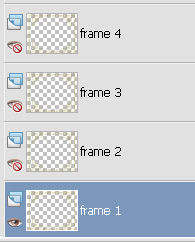
13.In the
layer palette, duplicate the frame layer until you have 3
duplicates, four in all. Click on the eye to hide all the frame
layers except the very last one down, high-light that layer.
 |
|
14.Go to
effects, find the xenofex filter, when you have it opened change
the setting to the illustration below. Click OK>
 |
|
15. Close
the eye in frame 1, open the eye on frame 2. Make sure you
are on the frame 2 laye the constellation filter,
just click the Random Seed once, leave the other settings where
they are. |
|
17. Repeat
these steps until you have all four frame layers with the
constellation effects. Clicking the Random Seed once on each
layer.. |
|
18. Having
done that, hide frame 2 3 and 4, leave frame 1 open go to. Go to
Edit, copy merged, open animation shop and go to edit, paste as
new animations. Nest, go back to psp, hide frame 1, open frame
2, go to edit, copy merged, go back to animation shop, go to
edit, paste after current frame. Back to psp. hide frame 2,
unhide frame 3, go to edit, copy merged, back to Animation shop,
edit, paste after current frame. Back to psp, hide frame 3,
unhide frame 4, edit, copy merged, back to AS, edit, past after
current frame. Go to view, animations, if you are happy with
your tag, Save as a gif. I resized mine by going to edit, select
all, next go to animation, resize animation, when the window
open, I used 80%, check the maintain aspect ratio.
|
|
19. Go to
view, animations, if you are happy with your tag, Save as a gif.
I resized mine by going to edit, select all, next go to
animation, resize animation, when the window open, I used 80%,
check the maintain aspect ratio.
I hope
you enjoyed my tutorial.
|
|