|
March 10, 2020 03/13/2020 03:47 PM I am using Paint Shop Pro version 2019, any version will work. This tutorial has not been tested except by me. Ifyou have a question click on my email to ask me. The scraps I used are no longer available as I have had them a long long time, therefore they are included in the zip. With two different folders of scraps. Supplies Needed The tube I am using is also from https://www.chrispasteltubes.fr/index by the fantastic artist ChrisPastel. Filters Filters Unlimited, Transparency...HERE
Email Me You can use the fat pencil to mark the line you are on. If it works.
|
||||
3. Open your main tube, if it has a large one copy and paste as a new layer, if it is too long and has enought to cut off, like down to the waiste is on it, use the selection tool, rectangle, make a selection around the excess at the bottom and press delete. Now place under the frame layer, resize until you're happy. Add the other main tube, resize and place on the right, add a drop shadow. H and V; 2, opacity; 60; blur; 10, black. |
||||
|
|
||||
4. Open element 4, past as a new layer, resize 65%, place upper left add a drop shadow. Element 2, resize 60%, free rotate 15 degrees left, add a drop shadow, duplicate and rotate 45 degre right, morror. with the pick tool place it under the flower . Copy and paste as a new layer, element 8, resize, 60% place on the left and mirror, drop shadow. |
||||
|
5. Elenent 13, as for placing it, I left it where it landed, add drop shadow. Element 11, it goes on the left of the blue flower, drop shadow. Element 15, place at the bottom left and a drop shadow. Element 12, place next to ele. 15, add drop shadow. Element 7, place next to element 12, add drop shadow. |
||||
|
Note~~a couple of steps back I resized the canvas to: 800X800, click the ceter box!!!! |
||||
| 6. Flower_6, resize 65%, copy and paste as a new layer, place on the left, under the lantern, add drop shadow.Flowers_5, resize 80%, past on the right under the tube, add frop shadow. Open the pendant place on theleft, dropshadow. | ||||
|
|
||||
|
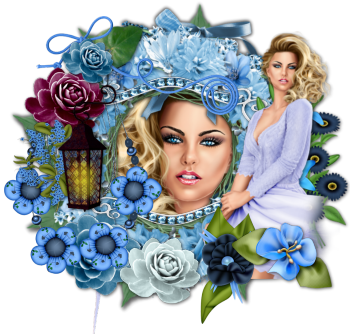
7. Next open string_3, resize 80% place at the top. Flower 9, resize 80%, place at the bottom , drop shadow, for some of the smaller images, lower the blur setting on the drop shadow. See a preview at this step.
|
||||
|
|
||||
|
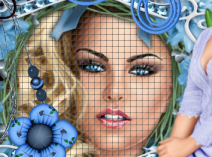
8. Find the close up in the layer palette, click on the eye to close it, just below, should be the paper that is in the center of the cluster frame. Select all float and defloat, create add a new layer below the frame, but above the close up, with the bucket fill it with color white. Now go to effects, texture, tiles, use these settings. First, make sure you click, square for shape,; tile angularity 75; tile size 10; border size 1; smoothness 25; depth 1; ambience 0; shininess 50; color white; angle 315; intencity 50; elevation 30. Click OK. We have to get rid of the white, so go to effects, Filters Unlimited, transparency, then, eliminate white, it should look like below.
|
||||
|
9. While it's on my mind, I am going to add a mask. Add a new layer at the very bottom of the layer palette, select all. Using paper 5, copy and paste into selection. Open the mask, one of mine is in the zip, JH-mask130, load it on to the image background layer, merge group. You may have to move down some to center it and also resize. |
||||
| 10. In the layer palette at the very top, add a newlayer. In the zip there is a sprinkle tube, created by me, so open the sprinkle tube, using the tube tool start using the tube tool to add the sprinkles around the outside of the tag, as may as you like. | ||||
|
|
||||
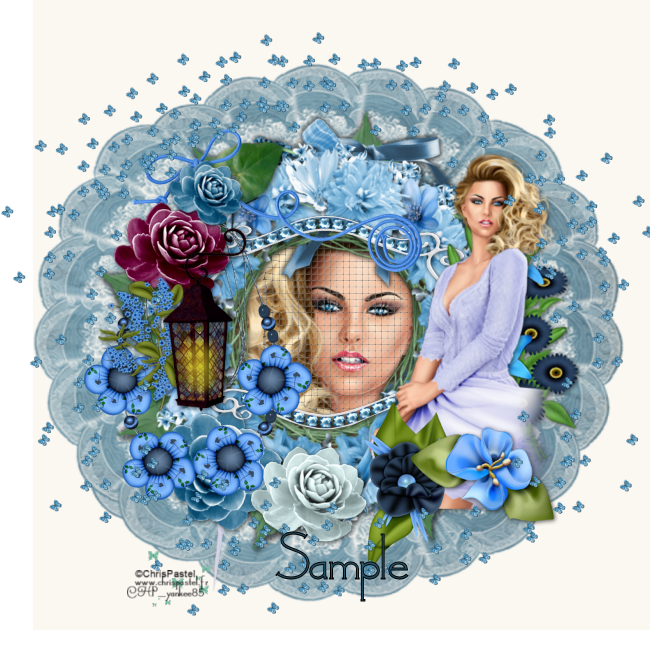
| 11.I resized my tag with these settings, go to image resize, put a dot on pixels, resize 650X650, all layers checked. Add the copyright, your name, save as a png. |


![]()
![]()