|


Paint Shop Pro TagTutorial Knock Three Times.

I used Paint Shop Pro, Version 2019 Ultimate
but I am reasonably sure it can be done in many other
versions as well. You must have some knowledge of
Paint Shop Pro.
What you create is yours to do anything you wish, on the web, in a foorum, It is prohibitat to use it in any sexal or criminal way. Thank you. Please do not link to any of my graphics or tutorials as it will cause both of us greif.
by
Jane's Haven
Any Questions?
Contact Us.
Supplies you will need.
The tube I am using is from,, www.picsfordesign.com and the artist is Alex_Prihodko, her creations are so beautiful.
A template, the one I am using is free and came from Here, below is a veiw of the template. You can used any template you wish.

Font of your choice.
Use My Fat Pencil to drag to the place you are in the tutorial.
My Supplies.

|
| 1. Open the template, delete the top layoes, it is the copyright. Go to image, canvas size 700x700, click the center, rename the template, your choice. Use the eye drop to establish the color you wish to use from your tube.te I used a red, #eb332d. |
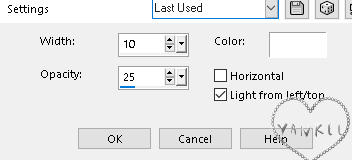
2.All the black strips, I left black, added a blinds texture. With these settings,below do all the blacks.
|
| 3. On all the others template parts , I am calling "elements". I used the red floodfill as my tubes has red in it. Except for the frames, they are colored with a pattern. |
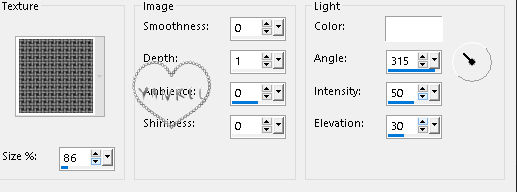
4. Lets start coloring the larger elements, for each one are created almost the same way with different textures included in the zip. . Starting at the bottom, click on the element, add a new layer above, select all, float, defloat, using the bucket fill with the red, delete the original. On some of the red ones, I used textures, in effects, texture, us the textures in the zip or find one you like, adjust to your likeing.Below is an example of the first element after it was flood fill, reduced in size. A veiw of the texture, settings.
After you added the flood fill and terxture, go up to the
next rectangle element in the layer palette, repeat the above.

|
5. Lets do the frames, the frist one near the bottom, select all, float, defloat, useing the flood fill tool,in the layer palette, above the frame, open the pattern, corel 08_103 in he material palette, forground, angle 0, scale, 100, fill the frame. I added a drop shadow, youu choice. Repeat this step on all ther frames. |
| 6. Copy and paste as a new layer, the tube you want to use. I resized the tube b y 40%, if you are using a different one, you may have to play with itto resize. Place on the right, add a drop shadow. |
| 7. Using the selections tool, set at rectangle, feather 0, serlect the head of the tube, with the cursor on the title bar of the tag, right click, press copy, deselect, on the title bar again, and paste as a new layer. |
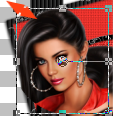
8.We have to make this ladies head larger by using the pick tool, setting on scale, now grab one corner nodes to pull it out larger, mine is 380W by321. Place this one on the large round red element, under the frame on the left. Click on the red round element in the layer palette, select all, float defloat, in the layerpalette, activate the head, imvert, press the delete kay. The final head size is 339x390
Below is a copy of the actual size, when completed.

|
|
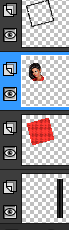
9. Next, duplice the same head image, yes the one you jiust placed, squeeze it like we just did withe the pick tool, grabing a corner node and pushing in, see example below. Also see the example of the layer palette for the placement of the heard imag we are working with. In the completed tag image, see how it loooks.
|
| 10. Once again, duplicate the head image, it goes down at the bottom on the long rectangel, belww the frame, resizeusing the pick tool to make smaller , postion on the right, in the layer activate the long rectange, go to selections select all float, defloat. In the layer palette, activate the head image, click invert and press the delete key. |
11. Add a mask, go to the bottom of the layer palette, if there is a empty layer,make active, if not add a new layer at the bottom. In the material palette, the forground is color, #750f0b, background color, white. Under the forground click thelittle square at the center which is gradient, open the material manager, gradient, find the two colors that are on the material palette, in my case the red and white. Setting in the gradient window, seee below. Flood fill the layer with the gradient. Now add the mask, one is provided in the zip or you can use one of your own, merge group.
<
|
12.Almost finished, active the larger tube, ising the eraser tool, erase the bottom of her legs.
Save as a png.
I do hope you had fun.
Add the copyright and your name, save as a png. |

