|
Snowing

Paint Shop Pro
Tutorial
I used Version 9
but I am reasonably sure it can be done in many other
versions as well. You must have some knowledge of
Paint Shop Pro
by
Jane's Haven
Any Questions?
Contact Us
Terms of Use
For what it's worth, this is my
first tag tutorial.
Supplies you will need.
VDL Snowflake filter,
Here.
Toadies filter, download
here.
Font of your choice.
My Supplies
Install the filters where ever your
filter folder may be. Unzip the supplies to a folder of
your choice. Add the mask to your Paint shop Pro Mask
folder. |
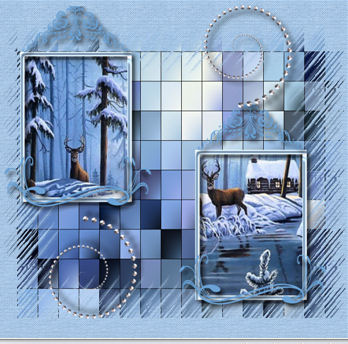
| 1. Open the snow-template-Y.psd
in your work space. As you can see it is has named
layers. |
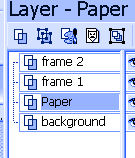
| 2. High light the paper
layer in the layer palette.
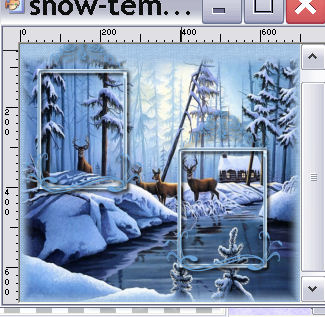
Open the snow scene in the work
space. Go to edit , copy, click on the snow template to
activate, edit paste as a new layer. Use the move tool,
move it around to show a good picture in the frames.
Rename this layer to picture 1.
 |
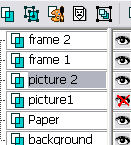
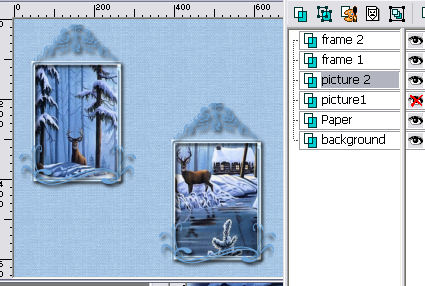
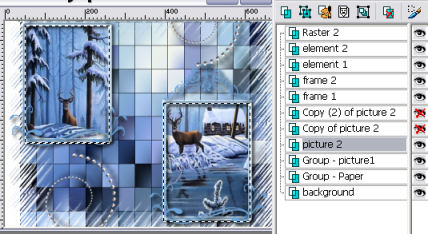
| 3. When you have in
place, go to the layer panel, right click and duplicate,
rename, picture 2. Hide picture 1 by clicking the eye in
the layer panel.
 |
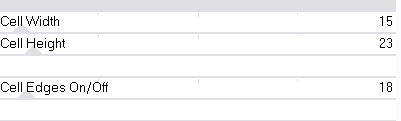
| 4. Use the selection tool,
rectangle, mode, Add(shift). See setting below.

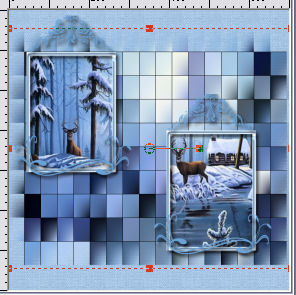
Make a selection
around each frame
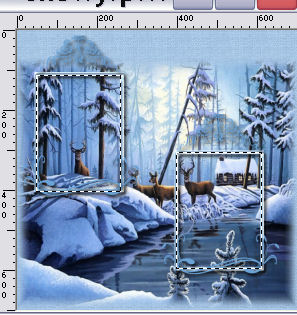
Next, make sure
picture 2 layer is high lighted, got to selections,
invert and hit the delete key on the keyboard. Select
None.
 |
| 5. In the layer panel, unhide
picture 1 and high light the picture 1 layer. Nest, go
to effects, plugins, find toadies filters, click on
Plain Mosaic Blur and click ok. The settings below may
look different than your unless you have the Toadies
filters installed in Filters Unlimited.
I used the deform
tool to push the picture up a bit from the bottom. |
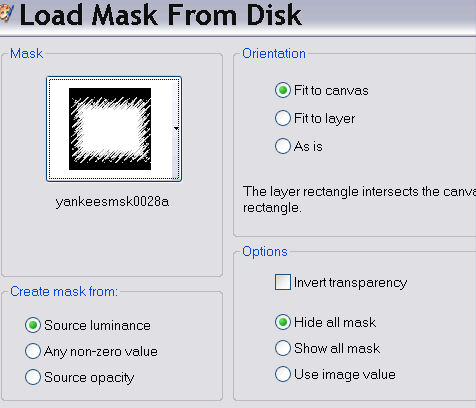
| 6. Still on the picture 1 layer,
go to layers, Load/SaveMakd, find the
yankeesmsk28a.PspMask, use settings below. Click load,
in the layer panel right click and merge group.
 |
| 7. Click on the top layer in the
layer panel, open the element, go to edit, copy, back to
your main image and paste as new layer. Move it to the
top right and duplicate the element. Flip and move the
duplicate down on the left bottom.
Feel free to add
your own elements. |
| 8. Open the red bird, edit, copy
go back to the main image and paste as a new layer.
Place the red bird on the right frame at the bottom,
duplicate, mirror and move to the left frame. |
| 9. Add your name and watermak.
Next, click on the paper layer and add a mask of your
choice or you can use the same one, merge group. |
|
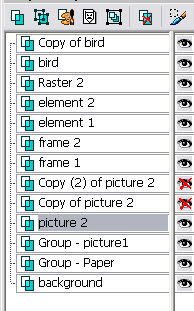
10. Now to add the
snow. Using the selection tool, rectangle, same settings
as above. Select the frames again. In the layer panel,
high light the picture 2 layer, duplicate two times for
a total of 3 picture 2 layers. Hide the two duplicate
layers and high light the bottom picture 2 layer.
 |
|
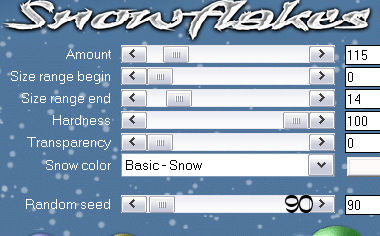
11 While on the picture 2 layer, go to
plugins, VDL Snowflake filter, when open use the
settings below
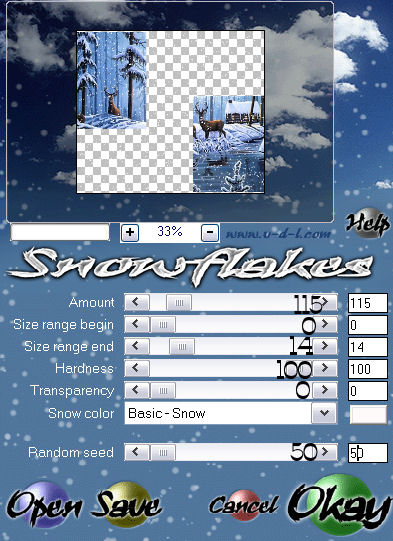
Hide Picture 2 layer, open copy of picture 2 layer,
with the copy 2 high lighted, open the snowflake filter
again. Use the setting below. You change only the very
last number.
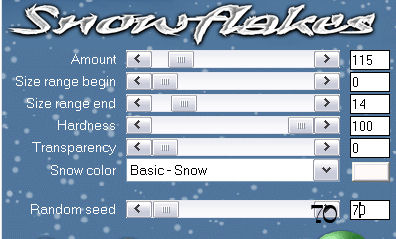
Next hide the copy of picture 2, open copy 2 of picture
2 and high light the layer.
Once again open the VDL snowflake filter and use the
settings below. Change only the very last number.
Selections, selection none |
|
12. Before I animate, I high lighted
the Group-picture 1 layer, go to image, resize 80%, next
high light the Group-paper layer and resize 110% and
moved this layer down a bit, witht the mover tool. |
|
13. Open Animations Shop. In PSP hide the two copies of
picture 2, open the picture 2 layer and high light.
 |
14. Next, to edit, copy merged, go to
animation shop, in AS, click edit, past as a new
animation. Instead of using edit I uuse this icon that
is on the over heard bar. |
|
15.Back in PSP, hde the picture 2 layer, open the
Copy of Picture and high light this layer.
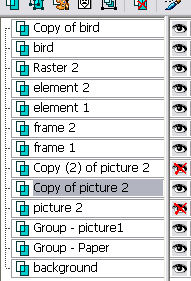
Again go to edit
Copy Merged and back to AS, go to edit, paste, After
Current Frame. |
|
16. Back to PSP, in the layer panel,
hide the Copy of Picture 2, open Copy 2 of Picture
2, high light this same layer. Go to edit,
Copy Merged.
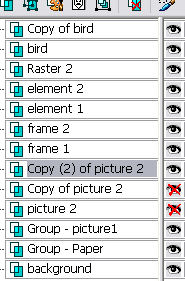
Back to AS, got to
edit, paste, Afrer Current Frame. |
|
17. Now the animations is almost
finished, but first, go to edit, select all, next go to
animation, in the drop down menu, find, Frame
Properties. when open, place the number 20 and click ok.
Now go to view, animations to take a look at your
animation. |
|
18. If you are happy with your
animation, you can rezie but first going to edit, select
all, next got to animation, reze animation, I used 80%,
with maintain aspic ratio checked.
 
I hope you have enjoyed my tutorial. |
|
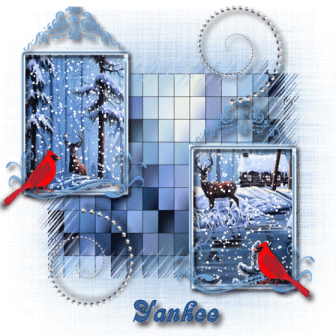
Smaller Version |
©by Jane's
Haven all Rights Reserved Except Where Otherwise Stated.