Cartoon Lady Tutorial
|
Created with Ulead Photo Impact.
PI
Version-I am using version XL,
I am certain it can be done in earlier versions, from PIXL on up to
PI12.
Skill Level: Intermediate
Author: Jane Davidson
Web Site:
Jane's Haven
Email
Terms of Use:Here
Tools used; Path drawing tool, paint on edges, blur, path
edit, paint brush, air brush, dodge tool, blur tool, burn tool,
smudge tool.
Extra files; The picture, which you may download
here.
|
|
|
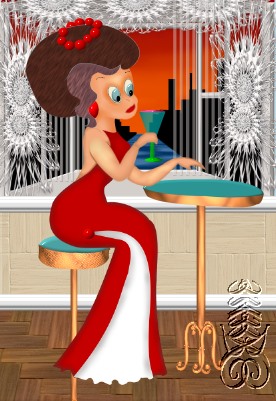
The first step is to find a picture, this one is clip art I found on one of my
disks I purchased. Sometimes I use pictures from coloring pages. You
must use a picture that you are sure does not have a strict copyright. Some
pictures I used are also one's I scan, that my Granddaughter draws for
me on paper with pencils. We are going to use mine for this tut. Which
you can download
here or the link
at the top.
|
|
This
is a long tutorial as I have tried to give you lots of details. Many
have asked me to write a tutorial on how I do people. I am not an expert
by no means, but I try. |
|
|
1.
Open the picture you downloaded from above in Photo impact, unzip it
first.;)) We are going to work on top of the picture with the path tools
for now. It is all done in 2D except where otherwise stated. After we
have it drawn, we have to make it come to life.
|
|
|
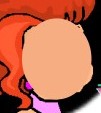
2. Using the shape, ellipse size; 70X81; color;
#F6AD81. Draw the ellipse right over the face of the picture, like the
example at left. Click into path edit mode to edit the shape around
the face. Just follow the line like your tracing. You will need to add
nodes, as you can see. |


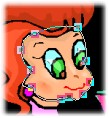
These two are enlarged
 |
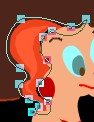
3. Eyes, Draw an ellipse
size; 15X32; color; #99FFFF or any color you want to use. Use the Path
Edit to trace around the eye like in the example. 3a.
Eyes part 2, draw another ellipse, size; 11x20, color; #5E9696, path
edit to make the shape like the inner part of the eye in the picture, Do
both eyes the same way.
3B. Eye part 3, for the dark part of the eye, draw an ellipse
for the right eye, size; 7X9, color; #603F0E, edit it it you need to do
so. Do the same for the left eye.
|
|
|
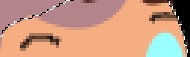
4. Eyebrows, you can use
the paint brush with a size of 2, color; black to draw a curved eyebrow
Paint Click the icon to
paint as object. to
paint as object.
|

|
5. Nose, I used the paint brush painting in mode, size;2, color; #A47350
and followed the line on the pic for her nose. |


|
6. Lips, for the lips, I didn't go by the picture,
I made more of a realistic lips. With the ellipse, size; 18X10, color;
#E10000, use the editing nodes to form the lips. |
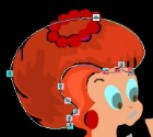  |
7. Hair, with the ellipse, size; 130X146; color;#4D251B, you can use
any color, follow the the outlines of the darker shade hair, 7A, Hair 2, now for the lighter shade of hair, draw an
ellipse; size; 49X76, color; I used; #B3848A, use the nodes to form the
second part of the hair. |

|
8. Neck; Draw and ellipse, size;39X21, color; #F6AD81, edit the
shape by following the neck on the picture. |
|


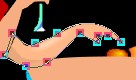 |
9. Arms, Draw an ellipse, size; 102X61, same color, to edit around
the left arm. For the left hand make the ellipse size; 31X26, same
color. 9A. Right arm, Draw an ellipse large enough for the size of the
right arm and hand in the same color as the rest of the skin and edit
again. |
|
 |
10. Her back; draw an ellipse size;31X84 same color and trace around
the back. |
|
 |
11. Dress front, Draw an ellipse size; 42X49, I used color; #C40000,
you may use any color you prefer. Edit the shape in the same way. |
|