|
| ||||||||||||||||||||||||

|
Created with Ulead Photo Impact. PI Version- I am using version12, I am certain it can be done in earlier versions, frn up to PI12. Skill Level: Intermediate
Author: Jane Davidson
Web Site: Jane's Haven
Path drawing tool, paint on edges, blur, path
edit, |
 |
Don't forget to save!!!! These pages are loaded with screen shots, please give it time to load. |
|
|
|
1. Open a new image 322X465, we have plenty of room, color white or any color you prefer. |
|
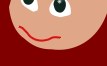
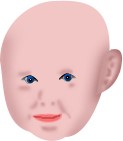
Head after editing. |
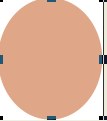
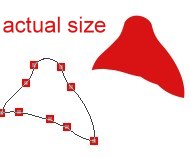
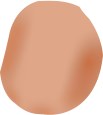
2. Using the path drawing tool, ellipse, color: #DFA688. 2D, size: 104X122. Go into path edit mode, add some nodes until you get a shape like the one on the left at the bottom. |

|
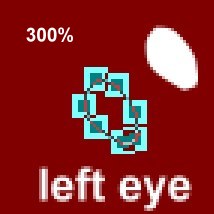
3. The Eyes: Left eye:
Path drawing tool ellipse, color white, 2D, size: 23X22. Click into path
edit, add nodes, edit the shape like the example at the left.
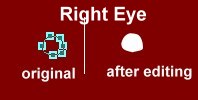
4.The right eye, is done the same way except a little different shape.
Draw an ellipse some color, 2D size: 26X23. See examples at left of the
right eye also
|
|
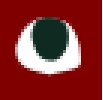
5.The inside of the right eye: Path drawing tool ellipse, 2D for now, color:#0F2A20, size: 12X18. Go into path edit to edit the shape so that the top of the shape lines up with the top of the first eye shape. When you have it like
you want it, change to 3D round set at: Width: 62, Depth:30, one light,
use the light bulb
|

|
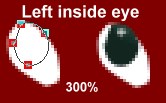
6. On to the left inside eye: Ellipse again, size:11X13, same color:#0F2A20, 2D, go to path edit and change the shape like the image on left. line the top up with the first shape, like you did on the right eye. Now change it to 3D round in the material options tool, with a width:62 Depth: 30, one light, click on the light bulb again, to adjust the light near the top of the shape. See example left.
This is what I have now, see left.
7. Lets draw his eyebrows: With the paint brush, size:2,
color:#C04C35, soft edge:0, transparency:0, click paint on object. |
|
8. Drawing the mouth: Using the line and arrow tool,
spline, size:1, color:#D91314. Line style normal, 2D. See the example at
left. 9. Cheeks: right cheek, Draw an ellipse, size:17X15, 2D, color:#D91314, same color as the mouth. Click into path edit mode and edit the shape as you see on the left.
10. Left cheek: Draw an ellipse, size:11X17, 2D, color:#D91314, Click into path edit mode and edit the shape as you see on the left., line the left side of the shape, with the left side of the face as his head is turned slightly to the left and you can't see all of the left cheek.
After adding the cheeks, see example at left, is what we have now. |
|
|
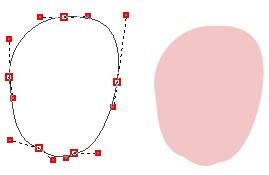
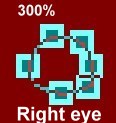
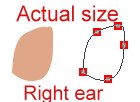
11. Right ear: Path editing tool, ellipse, color:#DFA688,
size:47X65, 2D, click into path edit to edit the shape, See example at
left. The top image is enlarged 300%.
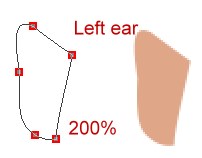
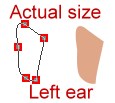
12. Left ear: Ellipse, color:#DFA688,size:33X63. 2D, path edit and edit the shape like the image at left. |
|
|
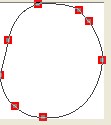
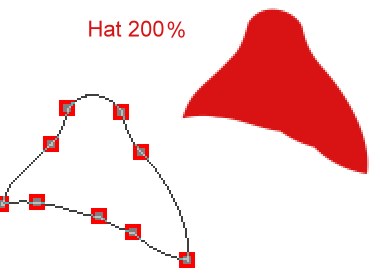
13. Hat: Path drawing
tool, ellipse, size:102X79, color:#D91314, 2D, click into path
edit. You will need to add nodes as you can see by the example.
|
|
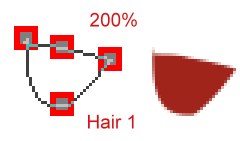
|
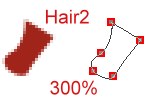
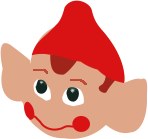
14. Next we will give him some hair, the first shape is for the front middle of his forehead, with the path drawing tool, ellipse, size:29X26, color:#A0241A, 2D. again go into path edit add nodes and edit the shape like the example at left.
15. Hair 2: With the path drawing tool, ellipse, same color:#A0241A, 2D. size:17X19. path edit again to edit like the shape left. this is his side burns on the right side, These two pieces of hair go behind the hat at the bottom. You can see on the left what he is looking like after adding the hair. He needs some shading on the face.
|
|
|
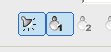
16. Face shading: Right click on the
face and convert object type: From text/path to image. Make sure the
face is selected. Using your burn tool with the setting on the left.. Run the burn tool down the right and left side of his face, only one wipe and on each side of his chin. Then use the blur tool with these settings you see on the left. Blend the shading from the burn tool, you just did on the sides of his face and chin.
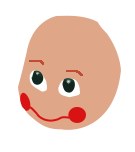
17. Use the airbrush with the settings in the example on the left and the color is:#A7674B. Airbrush down starting from above the inside of the eyes, to outline the nose. Look at the image at left. The example has also been blurred. change the airbrush size to 3, color:#A7674B for the nostrils. 18.Using the dodge with the settings at left, run it down between the two lines of, where we used the airbrush, the bridge of the nose when you come to the end of the nose, make a little wider sweep to both sides as the nose flares out at the end. Use the dodge tool under each eye to add highlights. Not too much, just a short stroke. Change to dodge tool size to:5 and lighten a small portion above his mouth to the nose. Use the blur tool, see setting at left, to blend in the airbrush and dodge. If don't like it, use the undo button and start over. :)) You can see what mine looks like after the blur is applied. It's ok if yours doesn't look exactly like mine, if your satisfied that is what matters.
|

 to adjust the light like the example at left.


|