| |
Open new image, white background
or what ever color you prefer.
450x523 |
|
|
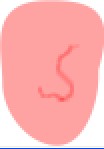
Head
Step 1
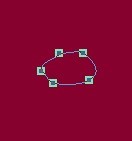
Path drawing tool, elipse, draw a 2d ellipse,
size:43X71, color
#FFA2A2, or color of your choice. Go into edit mode, edit to this shape,add
nodes,
see example at left. Set aside.We are going to make the eyes. |

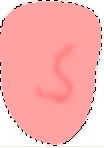
|
zoomed 300% |
|
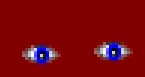
Eyes
Step 2
Path drawing tool, ellipse, 2D, color
white, draw a small ellipse, approximately 13x6, go into path edit mode,
zoom in 300% or more, see example at left, my finished size is 13X6. The eye you see while in edit mode is larger then
actual size. When you have the eye finished. click on the paint brush,
set at, size 1, soft edge 1, color black and paint on edges, POE. Blur
the edges of this shape. With these settings.

Now to make the rest of the eye's.
Path drawing tool, ellipse, 2d color blue #0000FF or
color of your choice, draw an ellipse size 5Wx6H, draw another, color
black 3D, width and border, set as high as it will go, size of the
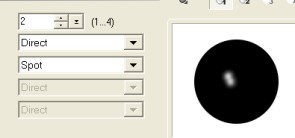
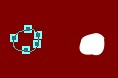
circle, 3x4, zoom in if you need. Open Material options and make
sure you have two lights first one direct, second light spot, use your
mouse to position the lights as shown. Assemble the three parts of the
eye as shown left, duplicate all three parts, you can group
them so that they are easier to work with, notice on the right eye I
have positioned the blue and black parts, slightly to the left, Move the
eyes aside for now.
|

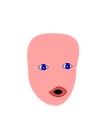
This is what we have now.
|
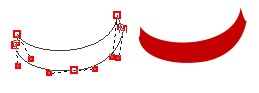
Santa's Mouth.
Step 3
Path drawing tool ellipse, 2D, color #EE3535, or choose your own color,
draw an ellipse size, 19WX11H, go into path edit, see the example at
left. Draw another ellipse, color black, 2D, size, a little smaller than
the first one for the mouth. Change to edit mode and edit the shape like
the one on the left. Remember those shapes are zoomed. Now take the
first mouth part and click on the paint brush, with
the setting at left.
I have also displayed the actual size.
The image at left is what we have so far.
Saving???? |
|
|
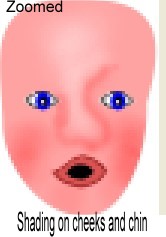
Step 4
Shading the face.
First you must right click and convert the face to an
image. We are going to use the burn tool with these settings, see left.
We must use some shading to show up Santa's nose. You can use the
original image at left, take it into PI , put it under your face and go
to properties and set the transparency a lower %, so you can see the
image under it to trace the shading. Use the blur tool with these settings:

NOTE "The illustrations of the burn and blur may look
different. depends on which version of PI your using."
NOTE: "If you position the eyes on
the face it will help with the shading.
Blur the line you just burned, tap it so that it
blends, not too much or it will disappear.
Use the dodge tool on the forehead, not too much, one
or two passes, lightly. Again use the blur, the same setting to blend.
Reduce the size of the dodge tool to size 10 on the
nose, between the eyes down to the end of the nose. Grab the burn tool again with these setting: size 5, soft edge:50,
Level: 57, to shade the left side of the nose, blur again, very lightly.
Burn tool, change to size to 15, to rosy his cheeks and on each side of
his chin. Yours may look different, we all have a
different style, if it looks right to you go with it. Feel free to
change anything you like. |
|
|
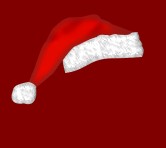
Step 5
Santa's Hat.
Grab your path drawing tool ellipse, color white, 2D,
make your ellipse size 86X32, go to edit mode and make the shape you see
on the left. Use the preset you downloaded at the top, when you have the
hat band finished.
The top part of his hat.
Draw an ellipse size: 107x29 or there abouts, color:#E50900, 2D. Path
edit and edit the shape as shown on left. Right click convert to image,
use the burn tool again with these settings: size 7, soft edge 82,
level: 100, to shade in some lines, like in the picture.
We are going to paint on edges, paint brush
color:#9E0B09 size: 10,
transparency: 0, soft edge: 100, effect, creative and paint on edges. We
need to blur all that with these settings,
size 20,
softness 50, level 5. You should have something similar to the image at
the left. Send this piece behind the band.
Draw another ellipse 29X26 for the ball on his hat. We don't want it
perfectly round, I added some nodes and edit it to the shape you see.
Then I used the white fur preset on the fur ball. Hat completed. |
|
|
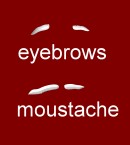
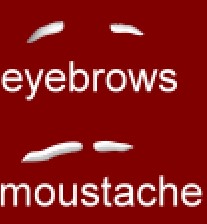
Step 6
Eye brow, moustache, and beard. Using the path tool,
ellipse, size:approximately:14X5, go to path edit mode until you
get the shape like in the example. Do two more for the moustache, color white, 2D. Of course you have to go into edit mode. The
first image you see is actual size the other one is 200% zoom . Apply
the eyebrow preset to all of these.
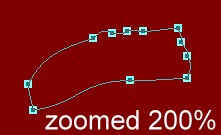
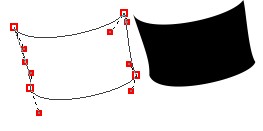
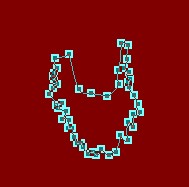
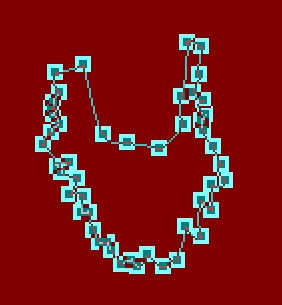
The Beard. Path
drawing tool ellipse, 2D, color, white, size:86X106, go into edit mode
and edit like the image at left. it doesn't have to be exactly
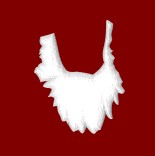
like mine. The bottom image is zoomed 200%. Fill
it with the santa beard preset. Right click and bring the hat band
forward, The beard should be behind the hatband at the top.
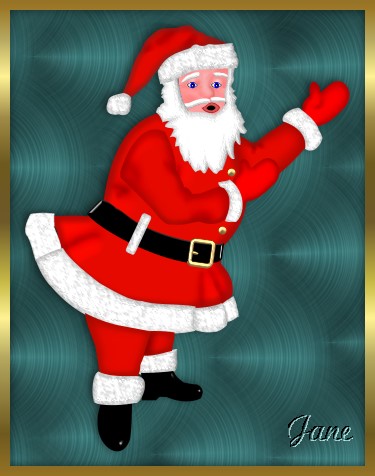
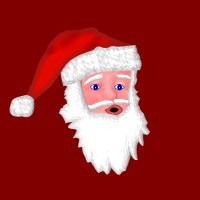
Put them together like the example.
Note: "Feel free to change to beard any way you
please". |